Matériel utilisé
- Raspberry Pi : Services légers (Pi-hole, Gatus).
- NAS Synology : Stockage, médias (Emby), et gestion documentaire (Paperless-ngx).
- PC Proxmox : Virtualisation des services gourmands (VM/LXC).
Architecture Logicielle
1. Raspberry Pi
- Pi-hole : Bloque les pubs et traqueurs.
- Gatus : Surveille la disponibilité des services.
Emulation Raspberry (Proxmox)
| VM-103 | Raspberry : – Pi-Hole – Dashy – Gatus | Bloque les pubs et traqueurs , Surveille la disponibilité des services. | — |
2. NAS Synology (DSM)
via Docker :
- Médias : Emby.
- Documents : Paperless-ngx.
- Sauvegarde : Duplicati.
Apps Synology:
- Photos : SynoPhotos ????
3. Proxmox (PC Principal)
| Conteneur/VM | Applications | Rôle | VLAN |
|---|---|---|---|
| VM-105 | Home Assistant | Automatisation domotique. | 10 |
| VM-101 | pfSense | Routeur/firewall. | — |
| LXC-115 | Frigate + Ollama (Docker) | Analyse vidéo (GPU) + IA locale. | 10 |
| LXC-200 | DevBox (Docker): – Jenkins – Developement | Developement , Intégration/déploiement (CI/CD). | 10 |
| LXC-125 | Services (Docker): – Firefly III – Transmission – SickChill – NZBGet – FileBot – Paperless-ai | Services (Gestion financière , Video ) | 10 |
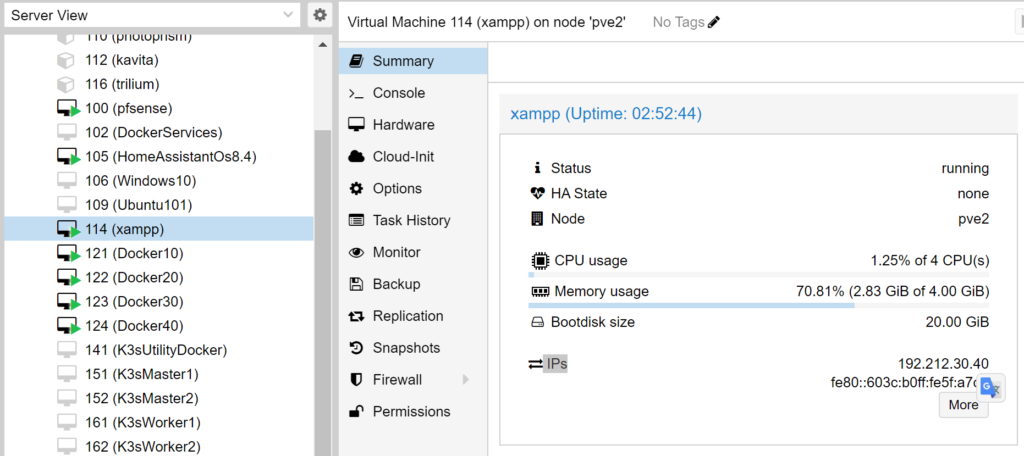
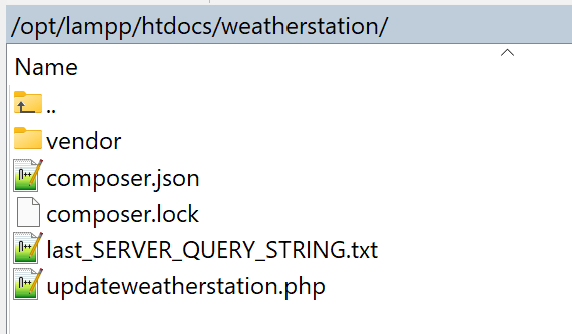
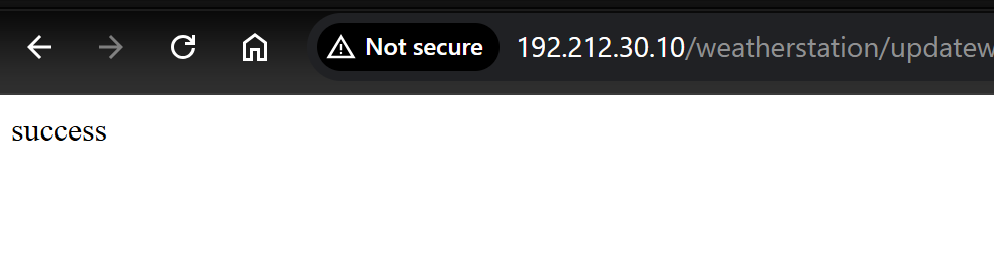
| VM-250 | Serveur Web: – WordPress – Bounce Weather | Site web/blog. | 20 |
Appareils Connectés (IoT)
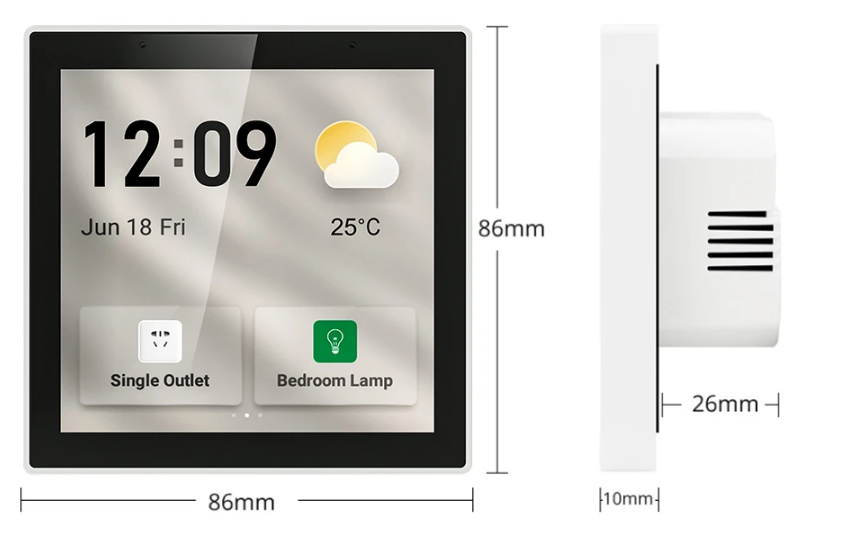
- Google Nest et Smart TV :
- Isolés dans un VLAN IoT pour la sécurité.
- Interagissent avec :
- Home Assistant (commandes vocales, scénarios).
- Emby (streaming depuis le NAS).
- Contrôlés via Pi-hole pour bloquer les pubs.
Bonnes Pratiques
- Réseau :
- VLANs séparés (Trusted, IoT, Web, Media).
- Pare-feu (pfSense) pour isoler les flux.
- GPU :
- Partage entre Frigate et Ollama via Docker dans un LXC dédié.
- Sauvegardes :
- Backuper Paperless, WordPress, et configurations Docker.
Schéma Réseau & Applications
graph TD
  %% Entry Point
  Internet --> OrangeBox --> pfSense

  %% VLAN Zones from pfSense
  pfSense --> VLAN10
  pfSense --> VLAN20
  pfSense --> VLAN30
  pfSense --> VLAN40
  pfSense --> RPi[(Raspberry Pi)]
  RPi --- Pihole
  Pihole --- Gatus

  %% VLAN 10 - Trusted
  subgraph "VLAN 10 - Trusted"
    direction TB
    VLAN10 --- VM101["VM-105: Home Assistant"]
    VM101 --- LXC103["LXC-115: Frigate + Ollama"]
    LXC103 --- VM106["LXC-200: Docker DevBox"]
    VM106 --- VM109["LXC-125: Docker Services"]

  end

  %% VLAN 20 - Web
  subgraph "VLAN 20 - Web"
    direction TB
    VLAN20 --- VM108["VM-250 : Web Server - WordPress"]
  end

  %% VLAN 30 - IoT
  subgraph "VLAN 30 - IoT WIP"
    direction TB
    VLAN30 --- GoogleNest[Google Nest]
    GoogleNest --- SmartTV[Smart TV]
  end

  %% VLAN 40 - Media
  subgraph "VLAN 40 - Media"
    direction TB
    VLAN40 --- NAS[(NAS - Synology DSM)]
    NAS --- Emby --- Paperless --- Duplicati
  end

  %% Styling
  style VLAN10 fill:#d5f5e3,stroke:#27ae60
  style VLAN20 fill:#d6eaf8,stroke:#3498db
  style VLAN30 fill:#fadbd8,stroke:#e74c3c
  style VLAN40 fill:#fdedec,stroke:#f39c12
Légende Détaillée
| Élément | Description |
|---|---|
| 🟠 pfSense (VM1) | Routeur/firewall gérant les VLANs et la sécurité. |
| 🟢 Raspberry Pi | Exécute Pi-hole (DNS) + Gatus (monitoring). |
| 🔵 NAS Synology | Stockage central + applications média (Emby) et docs (Paperless). |
| VLAN 10 (Trusted) | Services critiques : HA, Frigate, Ollama, Dev(Docker,Jenkins). |
| VLAN 20 (Web) | Services exposés : WordPress |
| VLAN 30 (IoT) | Appareils connectés (Google Nest, Smart TV) isolés pour sécurité. |
| VLAN 40 (Media) | Accès aux médias (Emby) depuis la Smart TV. |
Flux Clés à Retenir
- Google Nest/Smart TV → Communiquent avec Home Assistant (VLAN 10) via règles firewall précises.
- Frigate (VLAN 10) → Envoie les alertes à Home Assistant et Smart TV (via VLAN 30 autorisé).
- WordPress (VLAN 20) → Accessibles depuis Internet (port forwarding contrôlé par pfSense).
- Paperless (NAS) → Consommé par l’utilisateur via interface web NON exposée
pfSense
Exemple de Configuration pfSense (Règles VLAN 30 → VLAN 10)
| Action | Source | Destination | Port | Description |
|---|---|---|---|---|
| ✅ Allow | VLAN30 | VM-105 (HA) | 8123 | Accès à l’interface HA. |
| ✅ Allow | VLAN30 | LXC-115(Frigate) | 5000 | Flux vidéo pour affichage TV. |
| 🚫 Block | VLAN30 | VLAN10 | * | Bloquer tout autre accès. |
Bonnes Pratiques
Pour les Nest
- Mise à jour firmware : Vérifiez régulièrement via l’app Google Home.
- Isolation : Bloquez l’accès aux autres VLANs sauf pour :
- Home Assistant (port
8123).
- Home Assistant (port
Pour la Smart TV
- DNS personnalisé : Redirigez-la vers Pi-hole (Raspberry Pi) pour bloquer les pubs.
- Dans pfSense : DHCP → Option DNS = IP du Pi-hole.
- Désactivez le suivi : Désactivez ACR (Automatic Content Recognition) dans les paramètres TV.
Intégration de la Smart TV
Configuration Réseau
- VLAN : Même VLAN IoT (30) que les Nest pour simplifier.
- Règles pfSense :
- Autorisez la TV à accéder à :
- Internet (streaming Netflix/YouTube).
- Emby/Jellyfin (NAS) via le VLAN Media (ex: VLAN 40 si existant).
- Autorisez la TV à accéder à :
Interaction avec Home Lab
- Pour Emby/Jellyfin (NAS) :
- Montez un dossier partagé Synology en SMB/NFS accessible à la TV.
- Exemple de configuration Emby : docker-compose.yml (NAS) volumes: – /volume1/medias:/media
- Contrôle via Home Assistant :
- Intégrez la TV via HDMI-CEC ou API spécifique (ex: Samsung Tizen, LG webOS).
- Automatisations possibles :
- Allumer/éteindre la TV quand Frigate détecte un mouvement.
- Afficher les caméras sur la TV via un dashboard.
Intégration des Google Nest (Assistant Google)
Configuration Réseau
- VLAN Recommandé : Isolez-les dans un VLAN IoT (ex: VLAN 30) pour limiter l’accès au reste du réseau.
- Pour pfSense (VM-101) :CopyCréez un VLAN 30 → Interface dédiée → Règles de firewall : – Autoriser OUT vers Internet (HTTPS/DNS). – Bloquer l’accès aux autres VLANs (sauf exceptions comme Home Assistant).
Communication avec Home Assistant (VM-101)
- Via le protocole local :
- Activez Google Assistant SDK dans Home Assistant.
- Utilisez Nabu Casa (ou un domaine personnalisé avec HTTPS) pour la liaison sécurisée.
- Scénarios :
- Contrôle des lumières/prises via commandes vocales.
- Synchronisation avec vos calendriers/rappels.
DNS
💡 Network Overview (Goal)
- Orange Box (ISP Router/Gateway):
- IP:
192.168.1.1 - LAN/Internet Gateway
- IP:
- pfSense (Firewall/Router):
- WAN Interface: Gets IP from
192.168.1.0/24(e.g.192.168.1.2) - LAN Interface: New network
192.212.5.0/24(e.g.192.212.5.1)
- WAN Interface: Gets IP from
- Home Lab Devices:
- On
VLANsbehind pfSense
- On
- Pi-hole:
- Installed behind pfSense (e.g.
192.212.5.2)
- Installed behind pfSense (e.g.
🧠 What You Want:
- Devices on the lab network use Pi-hole for DNS.
- pfSense uses Pi-hole for DNS too (optional but recommended).
- Internet access for lab network is through pfSense ➝ Orange Box ➝ Internet.
- Lab network stays isolated from home network.
✅ Step-by-Step DNS Configuration
1. Install and Set Up Pi-hole
- Install Pi-hole on a device behind pfSense (VM, Raspberry Pi, etc.).
- Give it a static IP, e.g.
192.212.5.2 - During setup, don’t use DHCP (let pfSense handle that).
- Choose public upstream DNS (Cloudflare
1.1.1.1, Google8.8.8.8, etc.)
2. Configure pfSense to Use Pi-hole as DNS
a. Set DNS Server
- Go to System > General Setup in pfSense.
- In the DNS Server Settings, add: nginxCopyEdit
DNS Server 1: 192.212.5.2 (your Pi-hole IP) - Uncheck “Allow DNS server list to be overridden by DHCP/PPP on WAN” — this avoids getting ISP’s DNS from the Orange Box.
b. Disable DNS Resolver (Optional)
If you don’t want pfSense to do any DNS resolution, you can:
- Go to Services > DNS Resolver, and disable it.
- Or keep it enabled for pfSense’s internal name resolution, but forward to Pi-hole.
3. Configure DHCP on pfSense VLANs)
- Go to Services > DHCP Server > LAN
- Under “DNS Servers”, set:
DNS Server: 192.212.5.2 - Now, all clients getting IPs from pfSense will also use Pi-hole as DNS.
4. (Optional) Block DNS Leaks
To prevent clients from bypassing Pi-hole (e.g., hardcoded DNS like 8.8.8.8):
- Go to Firewall > NAT > Port Forward
- Create rules to redirect all port 53 (DNS) traffic to Pi-hole IP.
Example:
- Interface: LAN
- Protocol: TCP/UDP
- Destination Port: 53
- Redirect target IP:
192.212.5.2(Pi-hole) - Redirect Port: 53
Quelques rappels utiles
- pfSense est la gateway de chaque VLAN → donc une IP par VLAN
- Le DNS de chaque client dans chaque VLAN doit pointer vers le Pi-hole
- pfSense peut rediriger les requêtes DNS via une règle NAT (port 53) vers le Pi-hole si nécessaire
Configuration Ip/pfsense/proxmox
| Element | Schema IP | Regle Pfsense |
| PfSense | .5.1 (VM-101) | interface: LAN -> .5.X LAN_VLAN10 -> .10.X LAN_VLAN20 -> .20.X LAN_VLAN30 -> .30.X LAN_VLAN40 -> .40.X |
| PiHole | .5.2 (VM-102) | NAT : LAN*** address:53 192.212.5.2:53 |
| Raspberry | .5.3 (VM-103) | pihole and gatus |
| HomeAssistant | .10.105 | NAT redirect old home assistant: – LAN .30.105:1883 -> .10.105:8123 – LAN .30.105:1883 -> .10.105:8123 |
| FrigateOllama | .10.115 | |
| DockerServices | .10.125 | |
| Kubuntu | .10.135 | |
| DockerDevbox | .10.200 | |
| WebServer | .20.250 |
| synology | .40.111 | (network/interfaces)auto vmbr2.40 |
| qt21101l | .5.101 | |
| px30_evb | .5.102 | |
| Octoprint | .5.110 | |
| Doorbell | .5.150 | |
| dome01 | .5.151 | |
| dome02 | .5.152 | |
| ipcam_dome | .5.160 | |
| ipcam_0001 | .5.161 | |
| ipcam_0002 | .5.162 |
nano /etc/network/interfaces
auto vmbr2.10
iface vmbr2.10 inet static
address 192.212.10.245/24
vlan-raw-device vmbr2
auto vmbr2.20
iface vmbr2.20 inet static
address 192.212.20.245/24
vlan-raw-device vmbr2
auto vmbr2.30
iface vmbr2.30 inet static
address 192.212.30.245/24
vlan-raw-device vmbr2
auto vmbr2.40
iface vmbr2.40 inet static
    address 192.212.40.245/24
    vlan-raw-device vmbr2