
心冶 (Miya) — analyse linguistique et culturelle
❓ Peut-on lire 心冶 comme Miya (みや) ?
✅ Oui — dans le cadre d’un nom (名乗り読み / nanori), cette lecture est possible, mais très rare.
心 → み (mi)
Lecture admise dans les prénoms
Sens : cœur, esprit, intériorité
冶 → や (ya)
Ce n’est pas une lecture courante en japonais moderne
Mais や existe comme lecture de nom (nanori), attestée dans des dictionnaires de noms
Usage exceptionnel, mais légitime
➡️ 心冶 = Miya fonctionne uniquement comme nom, pas comme mot courant.
🔎 Sens et symbolique de 心冶
Sens de 冶
Fondre le métal
Raffiner, purifier
Transformer par la chaleur (métallurgie)
👉 C’est le kanji qui se rapproche le plus de l’idée de « fondre / transformer ».
Sens global de 心冶
« Raffiner le cœur »
« Transformer et purifier l’âme »
« Un cœur guéri par la transformation »
La symbolique est forte, profonde et cohérente avec une idée de santé intérieure obtenue par transformation.
🧭 Impression pour un Japonais
Nom très littéraire
Impression classique / archaïque
Évoque l’artisanat, l’alchimie intérieure
Donne le sentiment d’un nom choisi consciemment, artistique ou spirituel
Un Japonais ne pensera pas que c’est faux, mais que c’est intentionnel et peu commun.
🔁 Comparaison avec les autres options
Nom
Impression dominante
心谷
Poétique, nature, profondeur émotionnelle
心治
Guérison, soin, rétablissement
心冶
Transformation, raffinement, alchimie intérieure
👉 Si ton intention est la santé par la transformation (fondre → purifier → équilibrer),
心冶 (Miya) est le choix le plus précis symboliquement.
⚠️ Point d’attention (honnêteté)
冶 est un kanji rare
Certaines personnes peuvent :
Ne pas le reconnaître immédiatement
Demander comment il se lit
Ce n’est pas négatif — pour un nom artistique, spirituel ou tatouage, c’est souvent un atout.
✅ Verdict final
✔ Linguistiquement valable (comme nom)
✔ Sens profond et cohérent
✔ Correspond très bien à l’idée de « fondre / transformer pour guérir »
✔ Rare, mais pas incorrect
🌿 心冶 (Miya) est un nom fort, réfléchi et symboliquement riche
share nas to lxc
https://forum.proxmox.com/threads/tutorial-mounting-nfs-share-to-an-unprivileged-lxc.138506/

##
##host
sudo nano /etc/fstab
192.212.40.111:/volume1/10-System  /mnt/NAS_10-System nfs defaults 0 0
192.212.40.111:/volume2/30-Mail /mnt/NAS_30-Mail nfs defaults 0 0
192.212.40.111:/volume1/70-Photocopie /mnt/NAS_70-Photocopie nfs defaults 0 0
192.212.40.111:/volume1/80-Photo /mnt/NAS_80-Photo nfs defaults 0 0
192.212.40.111:/volume3/90-VideoClub /mnt/NAS_90-VideoClub nfs defaults 0 0
192.212.40.111:/volume3/99-Ftp /mnt/NAS_99-Ftp nfs defaults 0 0

sudo systemctl daemon-reload
sudo mount -a

#host for LXC200
nano /etc/pve/lxc/200.conf
mp0: /mnt/NAS_10-System/docker/VM200,mp=/System
mp1: /mnt/NAS_80-Photo,mp=/Photo

#host for LXC125
nano /etc/pve/lxc/125.conf
mp0: /mnt/NAS_10-System/docker/VM125,mp=/System
mp1: /mnt/NAS_90-VideoClub,mp=/VideoClub
mp2: /mnt/NAS_30-Mail,mp=/Mail

#host for LXC103
nano /etc/pve/lxc/103.conf
mp0: /mnt/NAS_10-System/docker/RASP103,mp=/System

#LXC***
sudo apt update
sudo apt install cifs-utils smbclient nfs-common passwd -y
sudo groupadd -g 10000 lxc_shares
sudo usermod -aG lxc_shares root
sudo usermod -aG lxc_shares david
sudo rebootCreate a Self-Signed SSL Certificate on Windows
You can create a self-signed certificate using PowerShell.
- Open PowerShell as Administrator.
- Run this command to create a new self-signed cert and export the key and certificate as
.pemfiles:
powershellCopyEdit# Define file paths
$certPath = "C:\Users\<YourUser>\bolt-certs"
New-Item -ItemType Directory -Path $certPath -Force

# Create self-signed cert
$cert = New-SelfSignedCertificate -DnsName "localhost" -CertStoreLocation "cert:\LocalMachine\My"

# Export certificate (public part)
Export-Certificate -Cert $cert -FilePath "$certPath\cert.pem"

# Export private key as PFX
$pfxPath = "$certPath\cert.pfx"
$password = ConvertTo-SecureString -String "YourStrongPassword" -Force -AsPlainText
Export-PfxCertificate -Cert $cert -FilePath $pfxPath -Password $password
- Convert the
.pfxfile to.keyand.pemfiles (Docker usually wants.keyand.crtor.pemseparately).
You can do this using OpenSSL (if you have it installed, e.g., via Git Bash or [WSL]):
bashCopyEdit# Navigate to cert folder (adjust path)
cd /c/Users/<YourUser>/bolt-certs

# Extract key
openssl pkcs12 -in cert.pfx -nocerts -out key.pem -nodes -password pass:YourStrongPassword

# Extract cert
openssl pkcs12 -in cert.pfx -clcerts -nokeys -out cert.pem -password pass:YourStrongPassword
Mirror pve-root Using LVM RAID1
What this means:
You configure a mirror (RAID1) so that any write to pve-root is also written to sda1. If your NVMe dies, you can still boot from sda1.
🧱 Requirements:
sda1must be equal to or larger thanpve-root(96 GB in your case)- You must convert
pve-rootinto a RAID1 logical volume (LVM mirror) - Some downtime or maintenance mode required
🧰 How-To (Overview Only):
- Backup First! (Always)
- Check current setup:
lvdisplay pve/root
- Wipe and prep
sda1:pvcreate /dev/sdavgextend pve /dev/sda
- Convert
pve-rootto RAID1:lvconvert --type mirror -m1 --mirrorlog core pve/root /dev/sda
This mirrors pve/root from your NVMe disk onto sda.
| Option | Meaning |
|---|---|
--type mirror | Convert the LV to a mirror (RAID1) |
-m1 | Use 1 mirror copy = total of 2 devices |
--mirrorlog core | Store mirror log in RAM |
pve/root | The logical volume to convert (your root) |
/dev/sda | The new disk to mirror onto |
- Confirm with:
lvs -a -o +devices
root@pve:~# lvs -a -o +devices
  LV              VG  Attr       LSize   Pool Origin Data%  Meta%  Move Log Cpy%Sync Convert Devices
  data            pve twi-aotz-- 794.30g             0.01   0.24                             data_tdata(0)
  [data_tdata]    pve Twi-ao---- 794.30g                                                     /dev/nvme0n1p3(26624)
  [data_tmeta]    pve ewi-ao----   8.10g                                                     /dev/nvme0n1p3(229966)
  [lvol0_pmspare] pve ewi-------   8.10g                                                     /dev/nvme0n1p3(232040)
  root            pve mwi-aom---  96.00g                                    100.00           root_mimage_0(0),root_mimage_1(0)
  [root_mimage_0] pve iwi-aom---  96.00g                                                     /dev/nvme0n1p3(2048)
  [root_mimage_1] pve iwi-aom---  96.00g                                                     /dev/sda(0)
  swap            pve -wi-ao----   8.00g                                                     /dev/nvme0n1p3(0)
- Optional but smart: Update your bootloader (
grub) to know how to boot from either disk:- update-initramfs -u
- update-grub
- grub-install /dev/sda
✅ Pros:
- Real-time mirroring (RAID1)
- Transparent failover if one device fails (bootable if configured)
⚠️ Cons:
- Adds complexity
- If misconfigured, can break boot
- Doesn’t protect against file deletion or config mistakes (RAID is not a backup)
how to check the mirror status, detect failures, and know when to do maintenance:
Use lvdisplay for more detail:
lvdisplay /dev/pve/root
Look for:
Mirror status: OK(or similar)- If a device has failed, you’ll see something like “failed” or “inconsistent”
Suggested Disk Layout Strategy
| Use Case | Current Disk | Suggested Role |
|---|---|---|
| Proxmox Root FS | nvme0n1 | ✅ Keep for now (fast, wear low) |
| VM/LXC storage | sdc1 (SSD) | ✅ Good, isolate high I/O loads |
| Backup / ISOs | sdb1 (HDD) | ✅ Archive/slow storage |
| Spare/Buffer | sda1 (SSD) | ⚠️ Could mirror root or use as L2ARC/ZIL (if ZFS) |
2. Watch NVMe Write Wear Over Time
Your NVMe shows:
yamlCopyEditPercentage Used: 0%
That’s excellent — you’re still early in the wear cycle. But with Proxmox, check every few months using:
bashCopyEditsmartctl -a /dev/nvme0n1 | grep -i percentage
3. Add Log Management
To reduce wear:
- Use
tmpfsfor/var/log(if RAM allows) - Limit
journaldpersistence:
# /etc/systemd/journald.conf
Storage=volatile
SystemMaxUse=200M
4. Consider Backup OS Snapshots or Mirroring Root
Use sda1 to:
- Mirror
pve-rootusing LVM RAID1 - Or just use it as a backup location via rsync or
lvm-snapshots
mount smb nas into proxmox
mkdir /mnt/NAS_10-System
mkdir /mnt/NAS_30-Mail
mkdir /mnt/NAS_70-Photocopie
mkdir /mnt/NAS_80-Photo
mkdir /mnt/NAS_90-VideoClub
mkdir /mnt/NAS_99-Ftp
nano /etc/fstab
//192.212.40.111/10-System /mnt/NAS_10-System cifs rw,credentials=/root/.sharelogin,nobrl,uid=101000,gid=101000 0 0
//192.212.40.111/30-Mail /mnt/NAS_30-Mail cifs rw,credentials=/root/.sharelogin,nobrl,uid=101000,gid=101000 0 0
//192.212.40.111/70-Photocopie /mnt/NAS_70-Photocopie cifs rw,credentials=/root/.sharelogin,nobrl,uid=101000,gid=101000 0 0
//192.212.40.111/80-Photo /mnt/NAS_80-Photo cifs rw,credentials=/root/.sharelogin,nobrl,uid=101000,gid=101000 0 0
//192.212.40.111/90-VideoClub /mnt/NAS_90-VideoClub cifs rw,credentials=/root/.sharelogin,nobrl,uid=101000,gid=101000 0 0
//192.212.40.111/99-Ftp /mnt/NAS_99-Ftp cifs rw,credentials=/root/.sharelogin,nobrl,uid=101000,gid=101000 0 0systemctl daemon-reload
mount -aSwitching GPU Binding (Live) Toggle GPU Driver Script (vfio-pci ↔ nvidia)
A single NVIDIA GPU cannot:
- Be passed through to a VM (via
vfio-pci) - And be used on the host or in LXC at the same time
Why?
Because when you bind the GPU to vfio-pci on boot, it’s invisible to the host and cannot be used by NVIDIA’s kernel driver (nvidia.ko).
Switch Between VM and LXC Use (Rebind on demand)
If you don’t need both at the same time, you can manually switch the GPU between:
- Passthrough to VM (bind to
vfio-pci) - Use on host / LXC (bind to
nvidia)
This lets you:
Then later give it back to the VM
Use the GPU for nvidia-smi or CUDA in an LXC container
here’s a single script that checks which driver is currently bound to your GPU, and automatically toggles between:
vfio-pci(for passthrough to VM)nvidia(for use on host or LXC)
#!/bin/bash

# === CONFIGURATION ===
GPU="0000:0a:00.0"
AUDIO="0000:0a:00.1"
VMID=131         # Your Windows VM ID
LXCID=115        # Your LXC container ID using the GPU

# === FUNCTIONS ===

get_driver() {
    basename "$(readlink /sys/bus/pci/devices/$1/driver 2>/dev/null)"
}

unbind_driver() {
    echo "$1" > "/sys/bus/pci/devices/$1/driver/unbind"
}

bind_driver() {
    echo "$1" > "/sys/bus/pci/drivers/$2/bind"
}

switch_to_nvidia() {
    echo "→ Switching to NVIDIA driver (LXC use)..."

    echo "Stopping VM $VMID..."
    qm stop $VMID
    sleep 3

    echo "Unbinding GPU from current driver..."
    unbind_driver "$GPU"
    unbind_driver "$AUDIO"

    echo "Loading NVIDIA modules..."
    modprobe nvidia nvidia_uvm nvidia_drm nvidia_modeset

    echo "Binding GPU to nvidia..."
    bind_driver "$GPU" nvidia
    bind_driver "$AUDIO" snd_hda_intel

    echo "Starting LXC container $LXCID..."
    pct start $LXCID

    echo "✔ Switched to NVIDIA mode."
}

switch_to_vfio() {
    echo "→ Switching to VFIO (VM passthrough)..."

    echo "Stopping LXC container $LXCID..."
    pct stop $LXCID
    sleep 3

    echo "Unbinding GPU from current driver..."
    unbind_driver "$GPU"
    unbind_driver "$AUDIO"

    echo "Loading VFIO modules..."
    modprobe vfio-pci

    echo "Binding GPU to vfio-pci..."
    bind_driver "$GPU" vfio-pci
    bind_driver "$AUDIO" vfio-pci

    echo "Starting VM $VMID..."
    qm start $VMID

    echo "✔ Switched to VFIO mode."
}

# === MAIN ===

MODE="$1"
CURRENT_DRIVER=$(get_driver "$GPU")
echo "Detected GPU driver: ${CURRENT_DRIVER:-none}"

case "$MODE" in
    --to-nvidia)
        switch_to_nvidia
        ;;
    --to-vfio)
        switch_to_vfio
        ;;
    "")
        if [ "$CURRENT_DRIVER" == "vfio-pci" ]; then
            switch_to_nvidia
        elif [ "$CURRENT_DRIVER" == "nvidia" ]; then
            switch_to_vfio
        elif [ -z "$CURRENT_DRIVER" ]; then
            echo "⚠️ No driver bound. Defaulting to NVIDIA..."
            switch_to_nvidia
        else
            echo "❌ Unknown driver bound: $CURRENT_DRIVER"
            exit 1
        fi
        ;;
    *)
        echo "Usage: $0 [--to-nvidia | --to-vfio]"
        exit 1
        ;;
esac

# === FINAL STATUS DISPLAY ===
echo
echo "🔍 Final GPU driver status:"
SHORT_GPU=$(echo "$GPU" | cut -d':' -f2-)
lspci -k | grep "$SHORT_GPU" -A 3
Auto-toggle based on current driver
./toggle-gpu.shForce switch to NVIDIA for LXC
./toggle-gpu.sh --to-nvidia Force switch to VFIO for VM passthrough
./toggle-gpu.sh --to-vfio passing NVIDIA GPUs to Windows VMs
passing NVIDIA GPUs to Windows VMs because NVIDIA detects you’re running in a virtualized environment and blocks the driver
The /etc/pve/qemu-server/131.conf
args: -cpu host,hv_vapic,hv_stimer,hv_time,hv_synic,hv_vpindex,+invtsc,-hypervisor
bios: ovmf
boot:
cores: 16
cpu: host
efidisk0: local-lvm:vm-131-disk-0,efitype=4m,pre-enrolled-keys=1,size=4M
hostpci0: 0000:0a:00,device-id=0x2882,pcie=1,vendor-id=0x10de,x-vga=1
ide0: PveSsd900:131/vm-131-disk-0.qcow2,size=180G
kvm: 1
machine: pc-q35-9.0
memory: 16384
meta: creation-qemu=9.2.0,ctime=1747334710
name: win10Gaming
net0: virtio=BC:24:11:77:A3:BC,bridge=vmbr2,firewall=1
numa: 0
onboot: 1
ostype: win10
scsihw: virtio-scsi-single
smbios1: uuid=45849243-d81c-4be4-9528-4620ee509da8,manufacturer=QkVTU1RBUiBURUNIIExJTUlURUQ=,product=SE04MA==,version=NS4xNg==,serial=RGVmYXVsdCBzdHJpbmc=,sku=RGVmYXVsdCBzdHJpbmc=,family=RGVmYXVsdCBzdHJpbmc=,base64=1
sockets: 1
tags: 5;sharegpu;windows
usb0: host=1532:0083
usb1: host=145f:0316
usb2: host=0a12:0001
vga: none
vmgenid: 87821f0a-458f-45da-8691-62fcd515c190Bind proxmox Inteface to a specifi IP
To achieve this setup — where Proxmox’s web interface on port 8006 is only accessible via one specific NIC and not the other — you need to bind the Proxmox web GUI to a specific IP address.
Here’s how you can do that:
🔧 Steps to Bind Port 8006 and 3128(spice) to a Specific NIC/IP
- Identify the NIC/IPs: Run: bashCopyEdit
ip aLet’s assume:- NIC1 (management):
192.212.5.245— this should allow port 8006 - NIC2 (isolated):
10.10.10.10— this should block port 8006
- NIC1 (management):
- Edit Proxmox Web GUI service config: Open this file: bashCopyEdit
nano /etc/default/pveproxy - Bind it to a specific IP (management interface): Find or add the line:
LISTEN_IP="192.212.5.245" - Restart the
pveproxyservice:systemctl restart pveproxyandsystemctl restart spiceproxyThis change will make the Proxmox GUI listen only on192.212.5.245, and not on all interfaces.
✅ Optional: Confirm It’s Working
You can test by running:
ss -tuln | grep 8006
You should see:
LISTEN 0 50 192.212.5.245:8006 ...
And not 0.0.0.0:8006 or 10.10.10.10:8006.
Step-by-Step NVIDIA Driver Installation for Proxmox Users
Use GPU in a VM (Passthrough only)
If you’re intentionally passing the GPU to a VM (e.g. Windows or Linux VM with GPU acceleration), then:
You should not install the NVIDIA driver on the Proxmox host.
Instead, install it inside the VM, and keep vfio-pci bound on the host.
Use GPU on the Proxmox Host or in LXC
Start by find the correct NVIDIA driver
https://www.nvidia.com/en-us/drivers
On the proxmox host :
sudo apt update
sudo apt install pve-headers-$(uname -r) build-essential dkms

wget https://us.download.nvidia.com/XFree86/Linux-x86_64/570.144/NVIDIA-Linux-x86_64-570.144.run
chmod +x ./NVIDIA-Linux-x86_64-570.144.run

./NVIDIA-Linux-x86_64-570.144.run
sudo ./NVIDIA-Linux-x86_64-570.144.run -dkms

nvidia-smi
nano /etc/modules-load.d/modules.conf
nvidia
nvidia_uvmls -al /dev/nvidia*root@pve:~# ls -al /dev/nvidia*
crw-rw-rw- 1 root root 195, 0 Apr 29 08:21 /dev/nvidia0
crw-rw-rw- 1 root root 195, 255 Apr 29 08:21 /dev/nvidiactl
crw-rw-rw- 1 root root 511, 0 Apr 29 08:21 /dev/nvidia-uvm
crw-rw-rw- 1 root root 511, 1 Apr 29 08:21 /dev/nvidia-uvm-tools
/dev/nvidia-caps:
total 0
drwxr-xr-x 2 root root 80 Apr 29 08:21 .
drwxr-xr-x 20 root root 4800 Apr 29 08:21 ..
cr-------- 1 root root 236, 1 Apr 29 08:21 nvidia-cap1
cr--r--r-- 1 root root 236, 2 Apr 29 08:21 nvidia-cap2nano /etc/pve/lxc/115.conf 1lxc.cgroup2.devices.allow: c 195:* rwm
lxc.cgroup2.devices.allow: c 236:* rwm
lxc.cgroup2.devices.allow: c 511:* rwm
lxc.mount.entry: /dev/nvidia0 dev/nvidia0 none bind,optional,create=file
lxc.mount.entry: /dev/nvidiactl dev/nvidiactl none bind,optional,create=file
lxc.mount.entry: /dev/nvidia-caps dev/nvidia-caps none bind,optional,create=file
lxc.mount.entry: /dev/nvidia-uvm dev/nvidia-uvm none bind,optional,create=file
lxc.mount.entry: /dev/nvidia-uvm-tools dev/nvidia-uvm-tools none bind,optional,create=filepct push 115 ./NVIDIA-Linux-x86_64-570.144.run /root/NVIDIA-Linux-x86_64-570.144.runOn Lxc :
sh NVIDIA-Linux-x86_64-570.144.run  --no-kernel-module
nvidia-smi
For Docker:
# Add Nvidia repository key
apt install -y gpg
curl -fsSL https://developer.download.nvidia.com/compute/cuda/repos/debian12/x86_64/3bf863cc.pub | gpg --dearmor -o /etc/apt/keyrings/nvidia-archive-keyring.gpg

# Add Nvidia repository
echo "deb [signed-by=/etc/apt/keyrings/nvidia-archive-keyring.gpg] https://developer.download.nvidia.com/compute/cuda/repos/debian12/x86_64/ /" | tee /etc/apt/sources.list.d/nvidia-cuda-debian12.list

# Update package lists
apt update

# Install Nvidia container toolkit
apt install nvidia-container-toolkit

nano /etc/docker/daemon.json
{
"default-runtime": "nvidia",
"runtimes": {
"nvidia": {
"path": "nvidia-container-runtime",
"runtimeArgs": []
}
}
}sudo nvidia-ctk runtime configure --runtime=dockernano /etc/nvidia-container-runtime/config.toml
# Set no-cgroups to true
no-cgroups = true
For testing
# Run a test Docker container to verify GPU usage
docker run --gpus all nvidia/cuda:12.6.1-base-ubuntu24.04 nvidia-smi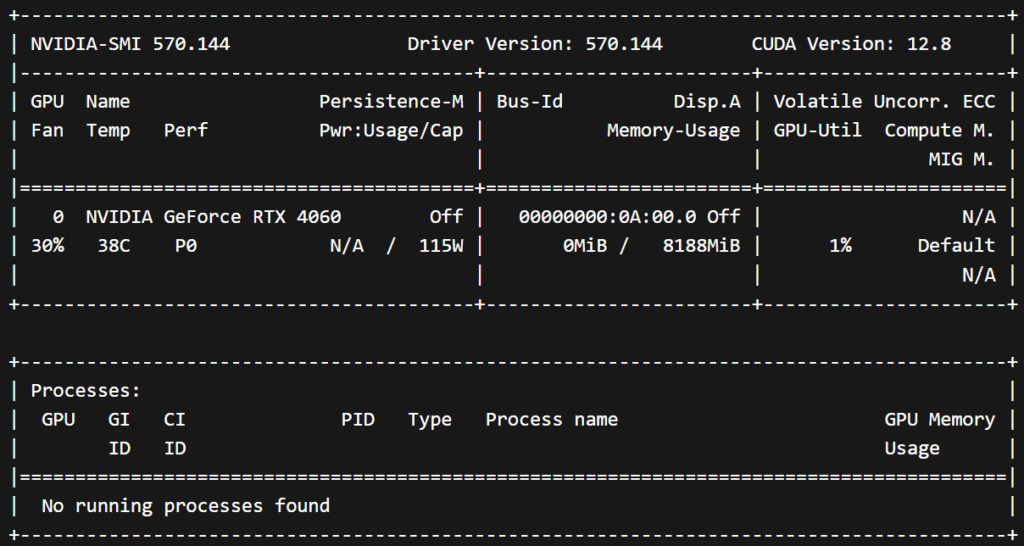
If needed before purge old nvidia driver
sudo apt remove --purge '^nvidia-.*'
sudo apt autoremove
Source :
- Be aware that one time the cgroup2 number as change after a full reboot (510->511) ↩︎