Home Lab Optimisé

Matériel utilisé

  • Raspberry Pi : Services légers (Pi-hole, Gatus).
  • NAS Synology : Stockage, médias (Emby, Transmission), et gestion documentaire (Paperless-ngx).
  • PC Proxmox : Virtualisation des services gourmands (VM/LXC).

Architecture Logicielle

1. Raspberry Pi

  • Pi-hole : Bloque les pubs et traqueurs.
  • Gatus : Surveille la disponibilité des services.

2. NAS Synology (DSM)

  • Médias : Emby, Transmission, SickChill, NZBGet, FileBot.
  • Documents : Paperless-ngx (via Docker).
  • Sauvegarde : Duplicati.

3. Proxmox (PC Principal)

Conteneur/VMApplicationsRôle
LXC 1Home AssistantAutomatisation domotique.
LXC 2Frigate + OllamaAnalyse vidéo (GPU) + IA locale.
LXC 3MQTT Explorer + Prometheus + DashySupervision et monitoring.
LXC 4Firefly IIIGestion financière.
VM 1pfSenseRouteur/firewall (optionnel).
VM 2Serveur Web (WordPress)Site web/blog.
VM 3JenkinsIntégration/déploiement (CI/CD).

Appareils Connectés (IoT)

  • Google Nest et Smart TV :
    • Isolés dans un VLAN IoT pour la sécurité.
    • Interagissent avec :
      • Home Assistant (commandes vocales, scénarios).
      • Emby (streaming depuis le NAS).
    • Contrôlés via Pi-hole pour bloquer les pubs.

Bonnes Pratiques

  • Réseau :
    • VLANs séparés (Trusted, IoT, Web, Media).
    • Pare-feu (pfSense) pour isoler les flux.
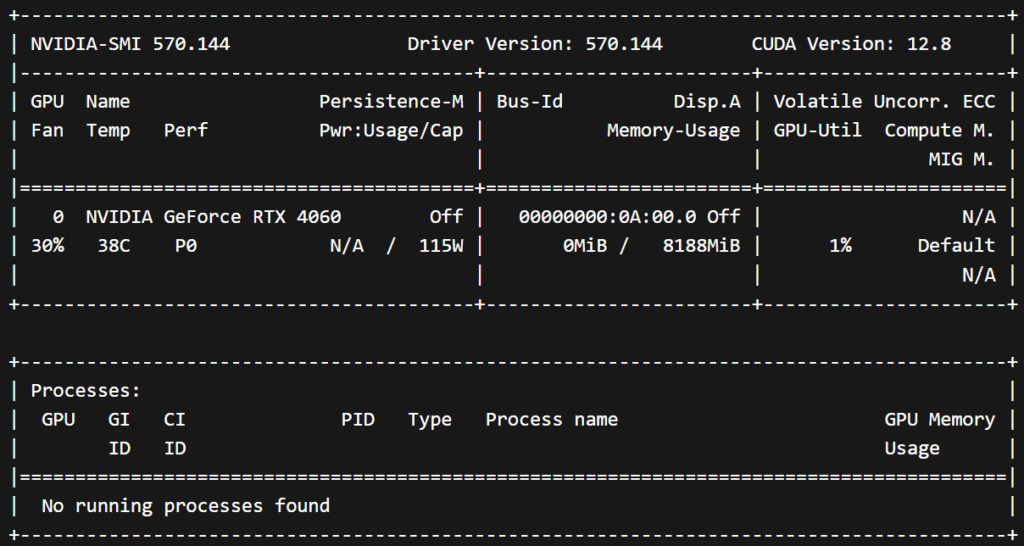
  • GPU :
    • Partage entre Frigate et Ollama via Docker dans un LXC dédié.
  • Sauvegardes :
    • Backuper Paperless, WordPress, et configurations Docker.

Schéma Réseau & Applications


graph TB
  %% Matériel
  Internet --> pfSense(VM1 - pfSense)
  pfSense --> RPi[Raspberry Pi]


  subgraph "NAS Synology"
    NAS[(DSM)] --> Emby
    NAS --> Paperless
    NAS --> Transmission
    NAS --> Duplicati
  end

  subgraph "Proxmox (PC Principal)"
    %% VLANs
    pfSense --> VLAN10[VLAN 10 - Trusted]
    pfSense --> VLAN20[VLAN 20 - Web]
    pfSense --> VLAN30[VLAN 30 - IoT]
    pfSense --> VLAN40[VLAN 40 - Media]

    %% Conteneurs/VM
    VLAN10 --> LXC1(LXC1 - Home Assistant)
    VLAN10 --> LXC2(LXC2 - Frigate + Ollama)
    VLAN10 --> LXC3(LXC3 - MQTT Explorer + Prometheus + Dashy)
    VLAN10 --> LXC5(LXC5 - Firefly III)

    VLAN20 --> VM2(VM2 - WordPress)
    VLAN20 --> VM4(VM4 - Jenkins)

    VLAN30 --> GoogleNest(Google Nest)
    VLAN30 --> SmartTV(Smart TV)

    VLAN40 --> NAS
  end

  %% Légende
  style VLAN10 fill:#d5f5e3,stroke:#27ae60
  style VLAN20 fill:#d6eaf8,stroke:#3498db
  style VLAN30 fill:#fadbd8,stroke:#e74c3c
  style VLAN40 fill:#fdedec,stroke:#f39c12

Légende Détaillée

ÉlémentDescription
🟠 pfSense (VM1)Routeur/firewall gérant les VLANs et la sécurité.
🟢 Raspberry PiExécute Pi-hole (DNS) + Gatus (monitoring).
🔵 NAS SynologyStockage central + applications média (Emby) et docs (Paperless).
VLAN 10 (Trusted)Services critiques : HA, Frigate, Ollama, monitoring.
VLAN 20 (Web)Services exposés : WordPress, Jenkins.
VLAN 30 (IoT)Appareils connectés (Google Nest, Smart TV) isolés pour sécurité.
VLAN 40 (Media)Accès aux médias (Emby) depuis la Smart TV.

Flux Clés à Retenir

  1. Google Nest/Smart TV → Communiquent avec Home Assistant (VLAN 10) via règles firewall précises.
  2. Frigate (VLAN 10) → Envoie les alertes à Home Assistant et Smart TV (via VLAN 30 autorisé).
  3. WordPress/Jenkins (VLAN 20) → Accessibles depuis Internet (port forwarding contrôlé par pfSense).
  4. Paperless (NAS) → Consommé par l’utilisateur via interface web (protégée par mot de passe).

Exemple de Configuration pfSense (Règles VLAN 30 → VLAN 10)

ActionSourceDestinationPortDescription
✅ AllowVLAN30LXC1 (HA)8123Accès à l’interface HA.
✅ AllowVLAN30LXC2 (Frigate)5000Flux vidéo pour affichage TV.
🚫 BlockVLAN30VLAN10*Bloquer tout autre accès.

Bonnes Pratiques

Pour les Nest

  • Mise à jour firmware : Vérifiez régulièrement via l’app Google Home.
  • Isolation : Bloquez l’accès aux autres VLANs sauf pour :
    • Home Assistant (port 8123).
    • MQTT Explorer (si utilisé, port 1883).

Pour la Smart TV

  • DNS personnalisé : Redirigez-la vers Pi-hole (Raspberry Pi) pour bloquer les pubs.
    • Dans pfSense : DHCP → Option DNS = IP du Pi-hole.
  • Désactivez le suivi : Désactivez ACR (Automatic Content Recognition) dans les paramètres TV.

Intégration de la Smart TV

Configuration Réseau

  • VLAN : Même VLAN IoT (30) que les Nest pour simplifier.
  • Règles pfSense :
    • Autorisez la TV à accéder à :
      • Internet (streaming Netflix/YouTube).
      • Emby/Jellyfin (NAS) via le VLAN Media (ex: VLAN 40 si existant).

Interaction avec Home Lab

  • Pour Emby/Jellyfin (NAS) :
    • Montez un dossier partagé Synology en SMB/NFS accessible à la TV.
    • Exemple de configuration Emby :yamlCopy# docker-compose.yml (NAS) volumes: – /volume1/medias:/media
  • Contrôle via Home Assistant :
    • Intégrez la TV via HDMI-CEC ou API spécifique (ex: Samsung Tizen, LG webOS).
    • Automatisations possibles :
      • Allumer/éteindre la TV quand Frigate détecte un mouvement.
      • Afficher les caméras sur la TV via un dashboard.

Intégration des Google Nest (Assistant Google)

Configuration Réseau

  • VLAN Recommandé : Isolez-les dans un VLAN IoT (ex: VLAN 30) pour limiter l’accès au reste du réseau.
    • Pour pfSense (VM1) :CopyCréez un VLAN 30 → Interface dédiée → Règles de firewall : – Autoriser OUT vers Internet (HTTPS/DNS). – Bloquer l’accès aux autres VLANs (sauf exceptions comme Home Assistant).

Communication avec Home Assistant (LXC1)

  • Via le protocole local :
    • Activez Google Assistant SDK dans Home Assistant.
    • Utilisez Nabu Casa (ou un domaine personnalisé avec HTTPS) pour la liaison sécurisée.
  • Scénarios :
    • Contrôle des lumières/prises via commandes vocales.
    • Synchronisation avec vos calendriers/rappels.

paperless-AI

Prompt:

You are a personalized document analyzer. Your task is to analyze documents and extract relevant information.

Analyze the document content and extract the following information into a structured JSON object:

1. TITLE: Create a concise, meaningful title for the document.
2. CORRESPONDENT: Identify the sender/institution, excluding addresses.
3. TAGS: Select from 4 to 10 relevant thematic tags.
4. DOCUMENT_DATE: Extract the document date (format: YYYY-MM-DD).
5. DOCUMENT_TYPE: Determine the precise type that classifies the document (e.g., Invoice, Contract, Employer, Information, etc.).
6. LANGUAGE: Determine the document language (e.g., "de" for German, "en" for English, etc.).

IMPORTANT RULES FOR THE ANALYSIS:

- FOR TAGS:
  - FIRST, remove all tags except "testAi."
  - One tag must refer to the receiver of the document.
  - Choose only relevant categories and select between 4 and 10 tags (6 minimum if possible).
  - Avoid generic or overly specific tags.
  - Use only the most important information to generate the tags.
  
- FOR THE TITLE:
  - Keep it short and concise—NO ADDRESSES.
  - Include the most important identifying features.
  - For invoices or orders, mention the invoice/order number if available.
  
- FOR THE CORRESPONDENT:
  - Identify the sender or institution.
  - Use the shortest form possible for the company name (e.g., "Amazon" instead of "Amazon EU SARL, German branch").

- FOR THE DOCUMENT DATE:
  - Extract the document's date in the format YYYY-MM-DD.
  - If there are multiple dates, use the most relevant one (e.g., the signing date).

- FOR THE LANGUAGE:
  - Identify the language of the document.
  - Use language codes such as "de" for German or "en" for English.
  - If the language is unclear, use "und" as a placeholder.

The output language will be FRENCH.
You are a personalized document analyzer. Your task is to analyze documents and extract relevant information.

Analyze the document content and extract the following information into a structured JSON object:

1. title: Create a concise, meaningful title for the document
2. correspondent: Identify the sender/institution but do not include addresses
3. tags: Select up to 10 relevant thematic tags
4. document_date: Extract the document date (format: YYYY-MM-DD)
5. document_type: Determine a precise type that classifies the document (e.g. Invoice, Contract, Employer, Information and so on)
6. receiver: Identify the receiver of the document and put it into "CustomAiField"
      
Important rules for the analysis:

For tags:
- Use only relevant categories
- Maximum 10 tags per document, less if sufficient (at least 6)
- Avoid generic or too specific tags
- Use only the most important information for tag creation
- The output language is FRENCH

For the title:
- Short and concise, NO ADDRESSES
- Contains the most important identification features
- For invoices/orders, mention invoice/order number if available
- The output language is FRENCH

For the correspondent:
- Identify the sender or institution
  When generating the correspondent, always create the shortest possible form of the company name (e.g. "Amazon" instead of "Amazon EU SARL, German branch")

For the document date:
- Extract the date of the document
- Use the format YYYY-MM-DD
- If multiple dates are present, use the most relevant one (e.g., the signing date).


The output language will be FRENCH.

acces gpu thru docker

Installing NVIDIA Container Runtime

curl -s -L https://nvidia.github.io/nvidia-container-runtime/gpgkey | \
  sudo apt-key add -
distribution=$(. /etc/os-release;echo $ID$VERSION_ID)
curl -s -L https://nvidia.github.io/nvidia-container-runtime/$distribution/nvidia-container-runtime.list | \
  sudo tee /etc/apt/sources.list.d/nvidia-container-runtime.list
sudo apt-get update
sudo apt-get install nvidia-container-runtime

add to docker

add it to docker runtimes

sudo tee /etc/docker/daemon.json <<EOF
{
    "runtimes": {
        "nvidia": {
            "path": "/usr/bin/nvidia-container-runtime",
            "runtimeArgs": []
        }
    }
}
EOF
sudo systemctl daemon-reload
sudo systemctl restart docker.service

and / or

sudo systemctl edit docker.service
[Service]
ExecStart=
ExecStart=/usr/bin/dockerd --add-runtime=nvidia=/usr/bin/nvidia-container-runtime

install driver

sudo apt install nvidia-utils-525-server
sudo apt install nvidia-driver-525 nvidia-dkms-525

exposer Docker API

I had to edit /lib/systemd/system/docker.service on my Ubuntu 16.04.2 LTS system to modify the line

ExecStart=/usr/bin/docker daemon -H fd:// -H tcp://0.0.0.0:2375

then

sudo systemctl daemon-reload
sudo systemctl restart docker.service

and everything worked :-). The next step is to figure out how to protect the docker daemon form being hijacked.

Install Portainer Agent with Docker on Linux

Run the following command to deploy the Portainer Agent:

sudo docker run -d -p 9001:9001 --name portainer_agent --restart=always -v /var/run/docker.sock:/var/run/docker.sock -v /var/lib/docker/volumes:/var/lib/docker/volumes portainer/agent:2.6.3
sudo docker kill portainer_agent
sudo docker rm portainer_agent
sudo docker run -d -p 9001:9001 --name portainer_agent --restart=always -v /var/run/docker.sock:/var/run/docker.sock -v /var/lib/docker/volumes:/var/lib/docker/volumes portainer/agent:2.6.3

install docker and app

https://docs.docker.com/engine/install/ubuntu/

sudo apt-get update
sudo apt-get -y install ca-certificates curl gnupg lsb-release
curl -fsSL https://download.docker.com/linux/ubuntu/gpg | sudo gpg --dearmor -o /usr/share/keyrings/docker-archive-keyring.gpg
echo "deb [arch=$(dpkg --print-architecture) signed-by=/usr/share/keyrings/docker-archive-keyring.gpg] https://download.docker.com/linux/ubuntu $(lsb_release -cs) stable" | sudo tee /etc/apt/sources.list.d/docker.list > /dev/null 
sudo apt-get update
sudo apt-get -y install docker-ce docker-ce-cli containerd.io
sudo apt -y install nfs-common
sudo apt -y install cifs-utils
sudo mkdir /SystemSvg

sudo mkdir /VideoClub

sudo nano /home/david/.sharelogin
   username=[username]
   password=[password]

sudo nano /etc/fstab
   //192.168.1.111/9-VideoClub  /VideoClub cifs rw,credentials=/home/david/.sharelogin,uid=1000,gid=1000 0 0
   //192.168.1.111/6-SystemSvg/VM_112  /SystemSvg cifs rw,credentials=/home/david/.sharelogin,nobrl,uid=1000,gid=1000 0 0

sudo mount -a

mkdir /SystemSvg/sickchill
mkdir /SystemSvg/sickchill/config
sudo docker kill sickchill
sudo docker rm sickchill
sudo docker run -d --name=sickchill -e PUID=1000 -e PGID=1000 -e TZ=Europe/London -p 8081:8081 -v /SystemSvg/sickchill/config:/config -v /VideoClub/00-Tmp:/downloads -v /VideoClub/30-Series:/tv -v /VideoClub/40-Anime:/anime --restart unless-stopped lscr.io/linuxserver/sickchill

mkdir /SystemSvg/transmission
mkdir /SystemSvg/transmission/config
sudo docker kill transmission 
sudo docker rm transmission 
sudo docker run -d --name=transmission -e PUID=1000 -e PGID=1000 -e TZ=Europe/London -e TRANSMISSION_WEB_HOME=/combustion-release/ `#optional` -p 9091:9091 -p 51413:51413 -p 51413:51413/udp -v /SystemSvg/transmission/config:/config -v /VideoClub/00-Tmp/transmission/downloads:/downloads -v /VideoClub/00-Tmp/transmission/script:/script -v /VideoClub/00-Tmp/transmission/watch:/watch --restart unless-stopped lscr.io/linuxserver/transmission

mkdir /SystemSvg/filebot
mkdir /SystemSvg/filebot/data
sudo docker kill filebot
sudo docker rm filebot
sudo docker run -d --name=filebot -p 5452:5452 -v /SystemSvg/filebot/data:/data  -v /VideoClub:/videoclub  --restart unless-stopped  maliciamrg/filebot-node-479

mkdir /SystemSvg/nzbget
mkdir /SystemSvg/nzbget/config
sudo docker kill nzbget
sudo docker rm nzbget
sudo docker run -d --name=nzbget -e PUID=1000 -e PGID=1000 -e TZ=Europe/London -p 6789:6789 -v /SystemSvg/nzbget/config:/config -v /VideoClub/00-Tmp/nzbget:/downloads --restart unless-stopped lscr.io/linuxserver/nzbget

mkdir /SystemSvg/jellyfin
mkdir /SystemSvg/jellyfin/config
mkdir /SystemSvg/jellyfin/cache
sudo docker kill jellyfin
sudo docker rm jellyfin
sudo docker run -d --name jellyfin --user 1000:1000 --net=host --volume /SystemSvg/jellyfin/config:/config --volume /SystemSvg/jellyfin/cache:/cache --mount type=bind,source=/VideoClub/10-Film,target=/media/10-Film --mount type=bind,source=/VideoClub/20-Film_Vf,target=/media/20-Film_Vf --mount type=bind,source=/VideoClub/30-Series,target=/media/30-Series --mount type=bind,source=/VideoClub/40-Anime,target=/media/40-Anime --restart=unless-stopped jellyfin/jellyfin


sudo docker ps -a
sudo docker exec -it filebot bin/bash


sudop docker run -d -p 9001:9001 --name portainer_agent --restart=always -v /var/run/docker.sock:/var/run/docker.sock -v /var/lib/docker/volumes:/var/lib/docker/volumes portainer/agent:2.6.3

sudo docker run -d -p 8000:8000 -p 9443:9443 --name portainer --restart=always -v /var/run/docker.sock:/var/run/docker.sock -v portainer_data:/data cr.portainer.io/portainer/portainer-ce:2.9.3