Home Lab Optimisé

Matériel utilisé

  • Raspberry Pi : Services légers (Pi-hole, Gatus).
  • NAS Synology : Stockage, médias (Emby, Transmission), et gestion documentaire (Paperless-ngx).
  • PC Proxmox : Virtualisation des services gourmands (VM/LXC).

Architecture Logicielle

1. Raspberry Pi

  • Pi-hole : Bloque les pubs et traqueurs.
  • Gatus : Surveille la disponibilité des services.

2. NAS Synology (DSM)

  • Médias : Emby, Transmission, SickChill, NZBGet, FileBot.
  • Documents : Paperless-ngx (via Docker).
  • Sauvegarde : Duplicati.

3. Proxmox (PC Principal)

Conteneur/VMApplicationsRôle
LXC 1Home AssistantAutomatisation domotique.
LXC 2Frigate + OllamaAnalyse vidéo (GPU) + IA locale.
LXC 3MQTT Explorer + Prometheus + DashySupervision et monitoring.
LXC 4Firefly IIIGestion financière.
VM 1pfSenseRouteur/firewall (optionnel).
VM 2Serveur Web (WordPress)Site web/blog.
VM 3JenkinsIntégration/déploiement (CI/CD).

Appareils Connectés (IoT)

  • Google Nest et Smart TV :
    • Isolés dans un VLAN IoT pour la sécurité.
    • Interagissent avec :
      • Home Assistant (commandes vocales, scénarios).
      • Emby (streaming depuis le NAS).
    • Contrôlés via Pi-hole pour bloquer les pubs.

Bonnes Pratiques

  • Réseau :
    • VLANs séparés (Trusted, IoT, Web, Media).
    • Pare-feu (pfSense) pour isoler les flux.
  • GPU :
    • Partage entre Frigate et Ollama via Docker dans un LXC dédié.
  • Sauvegardes :
    • Backuper Paperless, WordPress, et configurations Docker.

Schéma Réseau & Applications


graph TB
  %% Matériel
  Internet --> pfSense(VM1 - pfSense)
  pfSense --> RPi[Raspberry Pi]


  subgraph "NAS Synology"
    NAS[(DSM)] --> Emby
    NAS --> Paperless
    NAS --> Transmission
    NAS --> Duplicati
  end

  subgraph "Proxmox (PC Principal)"
    %% VLANs
    pfSense --> VLAN10[VLAN 10 - Trusted]
    pfSense --> VLAN20[VLAN 20 - Web]
    pfSense --> VLAN30[VLAN 30 - IoT]
    pfSense --> VLAN40[VLAN 40 - Media]

    %% Conteneurs/VM
    VLAN10 --> LXC1(LXC1 - Home Assistant)
    VLAN10 --> LXC2(LXC2 - Frigate + Ollama)
    VLAN10 --> LXC3(LXC3 - MQTT Explorer + Prometheus + Dashy)
    VLAN10 --> LXC5(LXC5 - Firefly III)

    VLAN20 --> VM2(VM2 - WordPress)
    VLAN20 --> VM4(VM4 - Jenkins)

    VLAN30 --> GoogleNest(Google Nest)
    VLAN30 --> SmartTV(Smart TV)

    VLAN40 --> NAS
  end

  %% Légende
  style VLAN10 fill:#d5f5e3,stroke:#27ae60
  style VLAN20 fill:#d6eaf8,stroke:#3498db
  style VLAN30 fill:#fadbd8,stroke:#e74c3c
  style VLAN40 fill:#fdedec,stroke:#f39c12

Légende Détaillée

ÉlémentDescription
🟠 pfSense (VM1)Routeur/firewall gérant les VLANs et la sécurité.
🟢 Raspberry PiExécute Pi-hole (DNS) + Gatus (monitoring).
🔵 NAS SynologyStockage central + applications média (Emby) et docs (Paperless).
VLAN 10 (Trusted)Services critiques : HA, Frigate, Ollama, monitoring.
VLAN 20 (Web)Services exposés : WordPress, Jenkins.
VLAN 30 (IoT)Appareils connectés (Google Nest, Smart TV) isolés pour sécurité.
VLAN 40 (Media)Accès aux médias (Emby) depuis la Smart TV.

Flux Clés à Retenir

  1. Google Nest/Smart TV → Communiquent avec Home Assistant (VLAN 10) via règles firewall précises.
  2. Frigate (VLAN 10) → Envoie les alertes à Home Assistant et Smart TV (via VLAN 30 autorisé).
  3. WordPress/Jenkins (VLAN 20) → Accessibles depuis Internet (port forwarding contrôlé par pfSense).
  4. Paperless (NAS) → Consommé par l’utilisateur via interface web (protégée par mot de passe).

Exemple de Configuration pfSense (Règles VLAN 30 → VLAN 10)

ActionSourceDestinationPortDescription
✅ AllowVLAN30LXC1 (HA)8123Accès à l’interface HA.
✅ AllowVLAN30LXC2 (Frigate)5000Flux vidéo pour affichage TV.
🚫 BlockVLAN30VLAN10*Bloquer tout autre accès.

Bonnes Pratiques

Pour les Nest

  • Mise à jour firmware : Vérifiez régulièrement via l’app Google Home.
  • Isolation : Bloquez l’accès aux autres VLANs sauf pour :
    • Home Assistant (port 8123).
    • MQTT Explorer (si utilisé, port 1883).

Pour la Smart TV

  • DNS personnalisé : Redirigez-la vers Pi-hole (Raspberry Pi) pour bloquer les pubs.
    • Dans pfSense : DHCP → Option DNS = IP du Pi-hole.
  • Désactivez le suivi : Désactivez ACR (Automatic Content Recognition) dans les paramètres TV.

Intégration de la Smart TV

Configuration Réseau

  • VLAN : Même VLAN IoT (30) que les Nest pour simplifier.
  • Règles pfSense :
    • Autorisez la TV à accéder à :
      • Internet (streaming Netflix/YouTube).
      • Emby/Jellyfin (NAS) via le VLAN Media (ex: VLAN 40 si existant).

Interaction avec Home Lab

  • Pour Emby/Jellyfin (NAS) :
    • Montez un dossier partagé Synology en SMB/NFS accessible à la TV.
    • Exemple de configuration Emby :yamlCopy# docker-compose.yml (NAS) volumes: – /volume1/medias:/media
  • Contrôle via Home Assistant :
    • Intégrez la TV via HDMI-CEC ou API spécifique (ex: Samsung Tizen, LG webOS).
    • Automatisations possibles :
      • Allumer/éteindre la TV quand Frigate détecte un mouvement.
      • Afficher les caméras sur la TV via un dashboard.

Intégration des Google Nest (Assistant Google)

Configuration Réseau

  • VLAN Recommandé : Isolez-les dans un VLAN IoT (ex: VLAN 30) pour limiter l’accès au reste du réseau.
    • Pour pfSense (VM1) :CopyCréez un VLAN 30 → Interface dédiée → Règles de firewall : – Autoriser OUT vers Internet (HTTPS/DNS). – Bloquer l’accès aux autres VLANs (sauf exceptions comme Home Assistant).

Communication avec Home Assistant (LXC1)

  • Via le protocole local :
    • Activez Google Assistant SDK dans Home Assistant.
    • Utilisez Nabu Casa (ou un domaine personnalisé avec HTTPS) pour la liaison sécurisée.
  • Scénarios :
    • Contrôle des lumières/prises via commandes vocales.
    • Synchronisation avec vos calendriers/rappels.

install docker and app

https://docs.docker.com/engine/install/ubuntu/

sudo apt-get update
sudo apt-get -y install ca-certificates curl gnupg lsb-release
curl -fsSL https://download.docker.com/linux/ubuntu/gpg | sudo gpg --dearmor -o /usr/share/keyrings/docker-archive-keyring.gpg
echo "deb [arch=$(dpkg --print-architecture) signed-by=/usr/share/keyrings/docker-archive-keyring.gpg] https://download.docker.com/linux/ubuntu $(lsb_release -cs) stable" | sudo tee /etc/apt/sources.list.d/docker.list > /dev/null 
sudo apt-get update
sudo apt-get -y install docker-ce docker-ce-cli containerd.io
sudo apt -y install nfs-common
sudo apt -y install cifs-utils
sudo mkdir /SystemSvg

sudo mkdir /VideoClub

sudo nano /home/david/.sharelogin
   username=[username]
   password=[password]

sudo nano /etc/fstab
   //192.168.1.111/9-VideoClub  /VideoClub cifs rw,credentials=/home/david/.sharelogin,uid=1000,gid=1000 0 0
   //192.168.1.111/6-SystemSvg/VM_112  /SystemSvg cifs rw,credentials=/home/david/.sharelogin,nobrl,uid=1000,gid=1000 0 0

sudo mount -a

mkdir /SystemSvg/sickchill
mkdir /SystemSvg/sickchill/config
sudo docker kill sickchill
sudo docker rm sickchill
sudo docker run -d --name=sickchill -e PUID=1000 -e PGID=1000 -e TZ=Europe/London -p 8081:8081 -v /SystemSvg/sickchill/config:/config -v /VideoClub/00-Tmp:/downloads -v /VideoClub/30-Series:/tv -v /VideoClub/40-Anime:/anime --restart unless-stopped lscr.io/linuxserver/sickchill

mkdir /SystemSvg/transmission
mkdir /SystemSvg/transmission/config
sudo docker kill transmission 
sudo docker rm transmission 
sudo docker run -d --name=transmission -e PUID=1000 -e PGID=1000 -e TZ=Europe/London -e TRANSMISSION_WEB_HOME=/combustion-release/ `#optional` -p 9091:9091 -p 51413:51413 -p 51413:51413/udp -v /SystemSvg/transmission/config:/config -v /VideoClub/00-Tmp/transmission/downloads:/downloads -v /VideoClub/00-Tmp/transmission/script:/script -v /VideoClub/00-Tmp/transmission/watch:/watch --restart unless-stopped lscr.io/linuxserver/transmission

mkdir /SystemSvg/filebot
mkdir /SystemSvg/filebot/data
sudo docker kill filebot
sudo docker rm filebot
sudo docker run -d --name=filebot -p 5452:5452 -v /SystemSvg/filebot/data:/data  -v /VideoClub:/videoclub  --restart unless-stopped  maliciamrg/filebot-node-479

mkdir /SystemSvg/nzbget
mkdir /SystemSvg/nzbget/config
sudo docker kill nzbget
sudo docker rm nzbget
sudo docker run -d --name=nzbget -e PUID=1000 -e PGID=1000 -e TZ=Europe/London -p 6789:6789 -v /SystemSvg/nzbget/config:/config -v /VideoClub/00-Tmp/nzbget:/downloads --restart unless-stopped lscr.io/linuxserver/nzbget

mkdir /SystemSvg/jellyfin
mkdir /SystemSvg/jellyfin/config
mkdir /SystemSvg/jellyfin/cache
sudo docker kill jellyfin
sudo docker rm jellyfin
sudo docker run -d --name jellyfin --user 1000:1000 --net=host --volume /SystemSvg/jellyfin/config:/config --volume /SystemSvg/jellyfin/cache:/cache --mount type=bind,source=/VideoClub/10-Film,target=/media/10-Film --mount type=bind,source=/VideoClub/20-Film_Vf,target=/media/20-Film_Vf --mount type=bind,source=/VideoClub/30-Series,target=/media/30-Series --mount type=bind,source=/VideoClub/40-Anime,target=/media/40-Anime --restart=unless-stopped jellyfin/jellyfin


sudo docker ps -a
sudo docker exec -it filebot bin/bash


sudop docker run -d -p 9001:9001 --name portainer_agent --restart=always -v /var/run/docker.sock:/var/run/docker.sock -v /var/lib/docker/volumes:/var/lib/docker/volumes portainer/agent:2.6.3

sudo docker run -d -p 8000:8000 -p 9443:9443 --name portainer --restart=always -v /var/run/docker.sock:/var/run/docker.sock -v portainer_data:/data cr.portainer.io/portainer/portainer-ce:2.9.3

Ajout pod Sickchill

deployement

La commande docker avec le filesystem preparé

docker run -d \
  --name=sickchill \
  -e PUID=1000 \
  -e PGID=1000 \
  -e TZ=Europe/London \
  -p 8081:8081 \
  -v /path/to/data:/config \
  -v /path/to/data:/downloads \
  -v /path/to/data:/tv \
  --restart unless-stopped \
  lscr.io/linuxserver/sickchill

traduction en kubernetes deploy :

apiVersion: apps/v1
kind: Deployment
metadata:
  name: sickchillserver 
  namespace: default
  labels:
    app: sickchill
spec:
  replicas: 1
  selector:
    matchLabels:
      app: sickchill
  template:
    metadata:
      labels:
        run: sickchillserver 
        app: sickchill
    spec:
      containers:
      - name: sickchillserver 
        image: lscr.io/linuxserver/sickchill
        env:
          - name: "PUID"
            value: "1000"
          - name: "PGID"
            value: "1000" 
        ports:
        - containerPort: 8081
          name: tr-http
        volumeMounts:
        - mountPath: /config
          name: tr-config
        - mountPath: /downloads
          name: tr-downloads
        - mountPath: /tv
          name: tr-tv
        - mountPath: /anime
          name: tr-anime
      volumes:
      - name: tr-anime
        hostPath:
          type: DirectoryOrCreate
          path: /Videoclub/40-Anime
      - name: tr-tv
        hostPath:
          type: DirectoryOrCreate
          path: /Videoclub/30-Series
      - name: tr-downloads
        hostPath:
          type: DirectoryOrCreate
          path: /Videoclub/00-Tmp/sickchill/downloads
      - name: tr-config
        hostPath:
          type: DirectoryOrCreate
          path: /usr/kubedata/sickchillserver/config
---
apiVersion: v1
kind: Service
metadata:
  name: sickchill-svc
spec:
  selector:
    app: sickchill
  ports:
    - name: "http"
      port: 8081
      targetPort: 8081
  type: NodePort

puis on recupere le recupere le port d’exposition

kubectl get all --all-namespaces | grep sickchill

resultat le dashboard est accessible https://<master-ip>:30610

Modification transmission

Modification du deployment de transmission


        volumeMounts:

        - mountPath: /downloads-sickchill
          name: tr-media-sickchill

        - mountPath: /script
          name: tr-script

      volumes:

      - name: tr-media-sickchill
        hostPath:
          type: DirectoryOrCreate
          path: /Videoclub/00-Tmp/sickchill/downloads

      - name: tr-script
        hostPath:
          type: DirectoryOrCreate
          path: /Videoclub/00-Tmp/transmission/script

Mettre à jour la config transmission : settings.json

    "script-torrent-done-enabled": true,
"script-torrent-done-filename": "/script/transmission-purge-completed_lite.sh",

Les scripts du repertoire /script

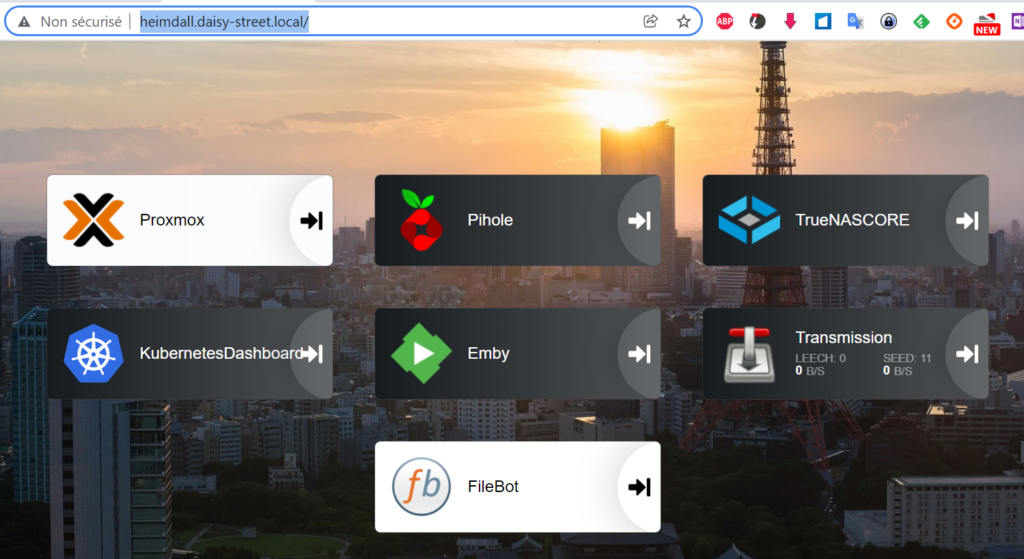
heimdall.daisy-street.local

Service

Passer le service heimdall de nodeport ClusterIP

Ingress

apiVersion: networking.k8s.io/v1
kind: Ingress
metadata:
  name:  heimdall-svc-ingress
  namespace: default
spec:
  ingressClassName: public
  rules:
  - host: heimdall.daisy-street.local
    http:
      paths:
      - pathType: Prefix
        path: "/"
        backend:
          service:
            name: heimdall-svc
            port:
              number: 80

Hosts

   192.168.1.26     heimdall.daisy-street.local    

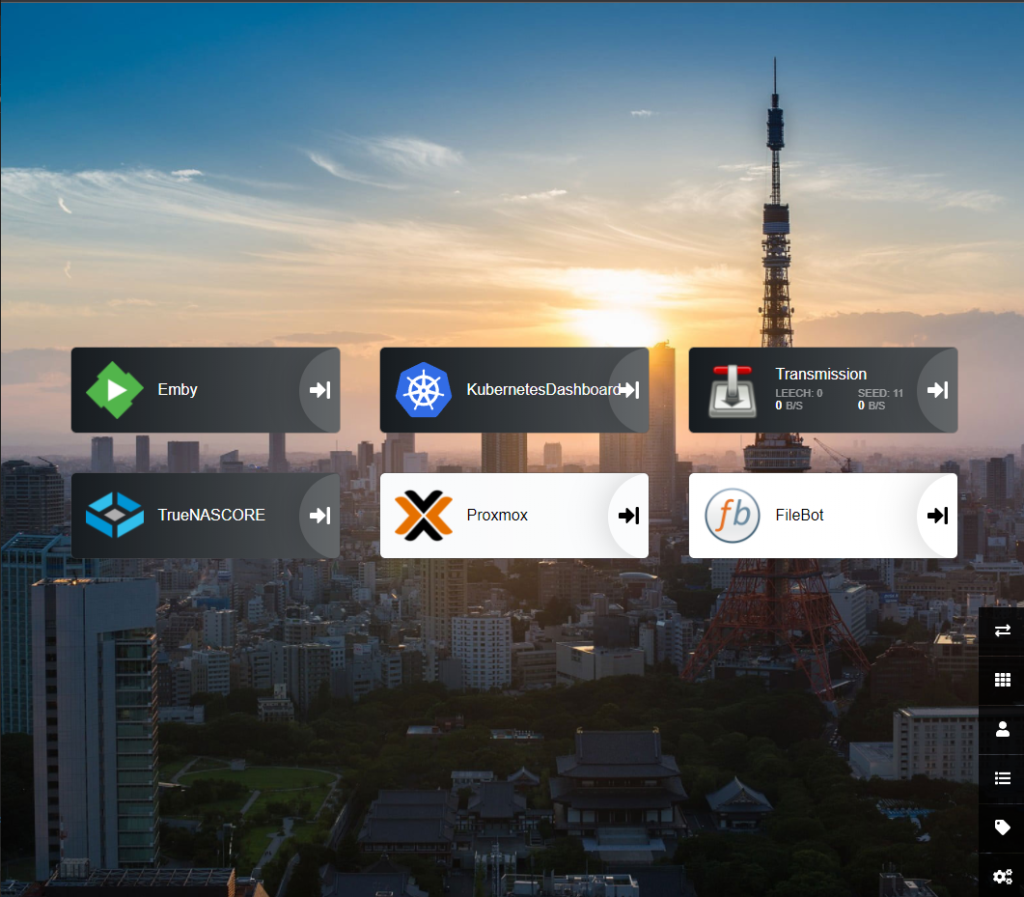
Resultat

Reference:

Ajout pod pihole-node

deployement

La commande docker-compose avec le filesystem preparé

version: "3"

# More info at https://github.com/pi-hole/docker-pi-hole/ and https://docs.pi-hole.net/
services:
  pihole:
    container_name: pihole
    image: pihole/pihole:latest
    ports:
      - "53:53/tcp"
      - "53:53/udp"
      - "67:67/udp"
      - "80:80/tcp"
    environment:
      TZ: 'America/Chicago'
      # WEBPASSWORD: 'set a secure password here or it will be random'
    # Volumes store your data between container upgrades
    volumes:
      - './etc-pihole/:/etc/pihole/'
      - './etc-dnsmasq.d/:/etc/dnsmasq.d/'
    # Recommended but not required (DHCP needs NET_ADMIN)
    #   https://github.com/pi-hole/docker-pi-hole#note-on-capabilities
    cap_add:
      - NET_ADMIN
    restart: unless-stopped

traduction en kubernetes deploy :

apiVersion: apps/v1
kind: Deployment
metadata:
  name: piholeserver 
  namespace: default
  labels:
    app: pihole
spec:
  replicas: 1
  selector:
    matchLabels:
      app: pihole
  template:
    metadata:
      labels:
        run: piholeserver 
        app: pihole
    spec:
      containers:
      - name: piholeserver 
        image: pihole/pihole:latest
        env:
          - name: "DNS1"
            value: "9.9.9.9"
          - name: "DNS2"
            value: "149.112.112.112"
        ports:
        - protocol: TCP
          containerPort: 53
          name: pihole-http53t
        - protocol: UDP
          containerPort: 53
          name: pihole-http53u
        - containerPort: 67
          name: pihole-http67
        - containerPort: 80
          name: pihole-http
        volumeMounts:
        - mountPath: /etc/pihole/
          name: pihole-config
        - mountPath: /etc/dnsmasq.d/
          name: pihole-dnsmasq
      volumes:
      - name: pihole-config
        hostPath:
          type: DirectoryOrCreate
          path: /usr/kubedata/piholeserver/pihole
      - name: pihole-dnsmasq
        hostPath:
          type: DirectoryOrCreate
          path: /usr/kubedata/piholeserver/dnsmasq.d
---		  
apiVersion: v1
kind: Service
metadata:
  name: pihole-svc
spec:
  selector:
    app: pihole
  ports:
    - name: "http53u"
      protocol: UDP
      port: 53
      targetPort: 53
    - name: "http53t"
      protocol: TCP
      port: 53
      targetPort: 53
    - name: "http67"
      port: 67
      targetPort: 67
    - name: "http"
      port: 80
      targetPort: 80
      nodePort: 30499
  type: NodePort

puis on recupere le port d’exposition

kubectl get all --all-namespaces | grep heimdall

resultat le dashboard est accecible https://<master-ip>:31541

Le password de l’admin est dans la log du pod

ou on peut definir un password en ligne de commande dans le pod

sudo pihole -a -p

Ajout pod heimdall-node

deployement

La commande docker avec le filesystem preparé

docker run -d \
  --name=heimdall \
  -e PUID=1000 \
  -e PGID=1000 \
  -e TZ=Europe/London \
  -p 80:80 \
  -p 443:443 \
  -v </path/to/appdata/config>:/config \
  --restart unless-stopped \
  lscr.io/linuxserver/heimdall

traduction en kubernetes deploy :

apiVersion: apps/v1
kind: Deployment
metadata:
  name: heimdallserver 
  namespace: default
  labels:
    app: heimdall
spec:
  replicas: 1
  selector:
    matchLabels:
      app: heimdall
  template:
    metadata:
      labels:
        run: heimdallserver 
        app: heimdall
    spec:
      containers:
      - name: heimdallserver 
        image: lscr.io/linuxserver/heimdall
        env:
          - name: "UID"
            value: "1000"
          - name: "GID"
            value: "100"  
        ports:
        - containerPort: 80
          name: heimdall-http
        - containerPort: 443
          name: heimdall-https
        volumeMounts:
        - mountPath: /config
          name: heimdall-config
      volumes:
      - name: heimdall-config
        hostPath:
          type: DirectoryOrCreate
          path: /usr/kubedata/heimdallserver/config
---
apiVersion: v1
kind: Service
metadata:
  name: heimdall-svc
spec:
  selector:
    app: heimdall
  ports:
    - name: http
      port: 80
      targetPort: 80
      nodePort: 32501
    - name: https
      port: 443
      targetPort: 443
  type: NodePort

puis on recupere le port d’exposition

kubectl get all --all-namespaces | grep heimdall

resultat le dashboard est accecible https://<master-ip>:32501

Ajout pod Filebot-node

deployement

La commande docker avec le filesystem preparé

docker run --rm -it \ 
     -v /Videoclub:/videoclub \
     -v /usr/kubedata/filebot-node/data:/data \
     -p 5452:5452 \
     maliciamrg/filebot-node-479

traduction en kubernetes deploy :

apiVersion: apps/v1
kind: Deployment
metadata:
  name: filebot-node 
  namespace: default
  labels:
    app: filebot
spec:
  replicas: 1
  selector:
    matchLabels:
      app: filebot
  template:
    metadata:
      labels:
        run: filebot-node 
        app: filebot
    spec:
      containers:
      - name: filebot-node 
        image: maliciamrg/filebot-node-479
        ports:
        - containerPort: 5452
          name: filebot-http
        volumeMounts:
        - mountPath: /data
          name: filebot-data
        - mountPath: /videoclub
          name: filebot-media
      volumes:
      - name: filebot-data
        hostPath:
          type: DirectoryOrCreate
          path: /usr/kubedata/filebot-node/data
      - name: filebot-media
        hostPath:
          type: Directory
          path: /Videoclub
---
apiVersion: v1
kind: Service
metadata:
  name: filebot
spec:
  selector:
    app: filebot
  ports:
    - name: "http"
      port: 5452
      targetPort: 5452
  type: NodePort

puis on recupere le recupere le port d’exposition

kubectl get all --all-namespaces | grep filebot

resultat le dashboard est accecible https://<master-ip>:32580

filebot-node en version 4.7.9 sans license

Deployer l’image docker

Deployer et lancer l’image filebot-node dans un docker

https://hub.docker.com/r/rednoah/filebot

docker run --rm -it -v $PWD:/volume1 -v data:/data -p 5452:5452 rednoah/filebot:node &

puis recupere l’id du container

docker container ls

Modifier l’image

envoyer le fichier filebot_4.7.9_amd64.deb dans le container

docker cp filebot_4.7.9_amd64.deb c35b578723a3:/tmp

Entre dans le container

docker exec -it c35b578723a3 bash

deployer filebot

sudo dpkg -i /tmp/filebot_4.7.9_amd64.deb
puis editer le app.js et suprimer le “–apply”.
sudo apt update
sudo apt install nano
nano /opt/filebot-node/server/app.js

commit de l’image

docker commit c35b578723a3 maliciamrg/filebot-node-479

sauvegarde l’image

docker save -o filebot-node-479.tar maliciamrg/filebot-node-479

ou

docker login
docker image push maliciamrg/filebot-node-479

Nettoyer docker

arreter le container

docker container kill c35b578723a3

et suprimer l’image

docker image rm maliciamrg/filebot-node-479

Ajout pod Transmission

deployement

La commande docker avec le filesystem preparé

docker run -d \
  --name=transmission \
  -e PUID=1000 \
  -e PGID=1000 \
  -e TZ=Europe/London \
  -e TRANSMISSION_WEB_HOME=/combustion-release/ `#optional` \
  -e USER=username `#optional` \
  -e PASS=password `#optional` \
  -e WHITELIST=iplist `#optional` \
  -e HOST_WHITELIST=dnsnane list `#optional` \
  -p 9091:9091 \
  -p 51413:51413 \
  -p 51413:51413/udp \
  -v <path to data>:/config \
  -v <path to downloads>:/downloads \
  -v <path to watch folder>:/watch \
  --restart unless-stopped \
  lscr.io/linuxserver/transmission

traduction en kubernetes deploy :

apiVersion: apps/v1
kind: Deployment
metadata:
  name: transmissionserver 
  namespace: default
  labels:
    app: transmission
spec:
  replicas: 1
  selector:
    matchLabels:
      app: transmission
  template:
    metadata:
      labels:
        run: transmissionserver 
        app: transmission
    spec:
      containers:
      - name: transmissionserver 
        image: lscr.io/linuxserver/transmission
        env:
          - name: "PUID"
            value: "1000"
          - name: "PGID"
            value: "1000" 
        ports:
        - containerPort: 9091
          name: tr-http
        - containerPort: 51413
          name: tr-https
        volumeMounts:
        - mountPath: /config
          name: tr-config
        - mountPath: /downloads
          name: tr-media
        - mountPath: /watch
          name: tr-watch
      volumes:
      - name: tr-watch
        hostPath:
          type: DirectoryOrCreate
          path: /Videoclub/00-Tmp/transmission/watch
      - name: tr-media
        hostPath:
          type: DirectoryOrCreate
          path: /Videoclub/00-Tmp/transmission/downloads
      - name: tr-config
        hostPath:
          type: DirectoryOrCreate
          path: /usr/kubedata/transmissionserver/config
---
apiVersion: v1
kind: Service
metadata:
  name: transmission
spec:
  selector:
    app: transmission
  ports:
    - name: "http"
      port: 9091
      targetPort: 9091
    - name: "https"
      port: 51413
      targetPort: 51413
  type: NodePort

puis on recupere le recupere le port d’exposition

kubectl get all --all-namespaces | grep transmission

resultat le dashboard est accecible https://<master-ip>:30312