low space

On my server (with docker) i have sometime the space of the root directory to 0%

df -h
Filesystem                    Size  Used Avail Use% Mounted on
tmpfs                          86M   11M   75M  13% /run
/dev/sda2                      20G   20G     0 100% /
tmpfs                         476M     0  476M   0% /dev/shm
tmpfs                         5,0M     0  5,0M   0% /run/lock
192.212.40.6:/6-40-SystemSvg  227G   32G  184G  15% /SystemSvg
192.212.40.6:/9-VideoClub     1,8T  774G  967G  45% /VideoClub
tmpfs                         146M  8,0K  146M   1% /run/user/1000

docker clean non essential stuff

docker system prune -a
docker volume rm $(docker volume ls -qf dangling=true)
docker system prune --all --volumes --force

empty trash

rm -rf ~/.local/share/Trash/*

or

sudo apt install trash-cli
trash-empty

system clean sweep

sudo apt-get autoremove
sudo apt-get clean
sudo apt-get autoclean

find big stuff in file system

sudo du -h --max-depth=1 | sort -h
0       ./dev
0       ./proc
0       ./sys
4,0K    ./cdrom
4,0K    ./media
4,0K    ./mnt
4,0K    ./srv
4,0K    ./VideoClub
16K     ./lost+found
16K     ./opt
52K     ./root
60K     ./home
68K     ./tmp
1,3M    ./run
6,7M    ./etc
428M    ./boot
823M    ./SystemSvg
1,7G    ./snap
4,7G    ./var
9,9G    ./usr
20G     .

limit log in container

https://forums.docker.com/t/some-way-to-clean-up-identify-contents-of-var-lib-docker-overlay/30604/53

<service_name>
	logging:
		options:
			max-size: "10m"
			max-file: "5"

https://forums.docker.com/t/some-way-to-clean-up-identify-contents-of-var-lib-docker-overlay/30604/52

/etc/docker/daemon.json

{
  "log-opts": {
    "max-size": "10m",
    "max-file": "5"
  }
}

dont forget the “,” if they have allready param in daemon.json

Add Weather Station

source

https://github.com/maliciamrg/Bresser-Weather-Station

dns

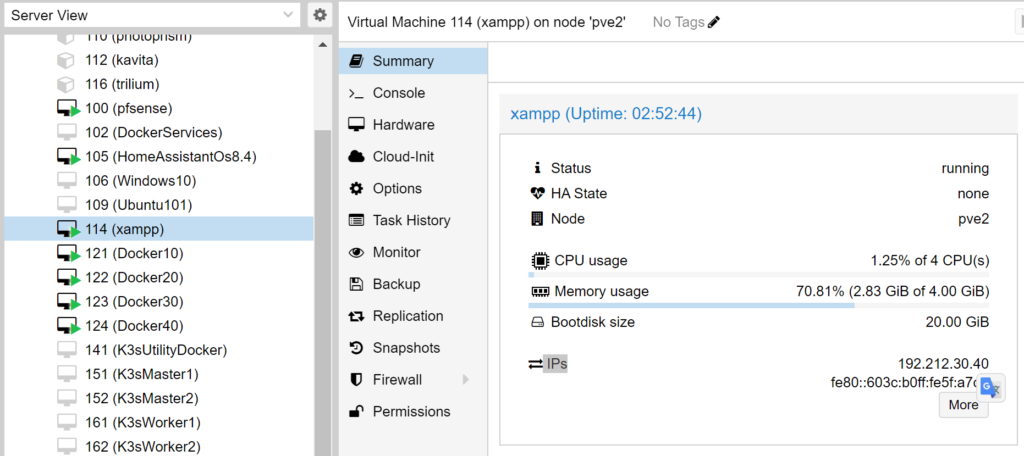
xampp install

xamp server
sudo apt update -y
sudo apt upgrade -y
wget "https://downloads.sourceforge.net/project/xampp/XAMPP%20Linux/8.2.4/xampp-linux-x64-8.2.4-0-installer.run?use_mirror=netix&download=" -O xampp-linux-x64-8.2.4-0-installer.run
sudo ./xampp-linux-x64-8.2.4-0-installer.run
sudo usermod -aG daemon david
sudo chown -R daemon:daemon /opt/lampp/htdocs
sudo chmod g+w /opt/lampp/htdocs

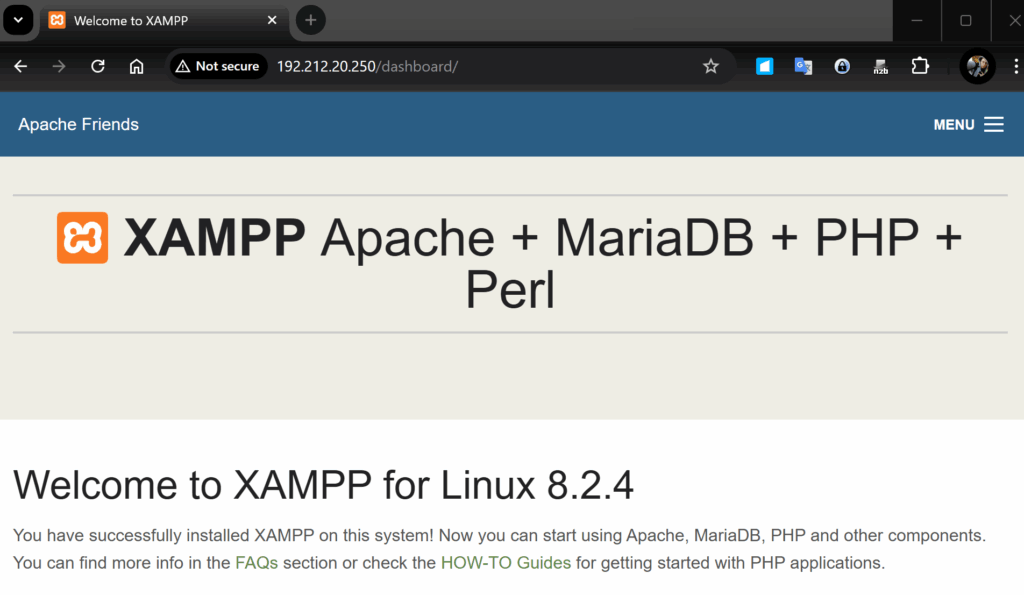
result :

auto start xampp server at ubuntu startup:

sudo nano /etc/systemd/system/xampp.service
[Unit]
Description=XAMPP

[Service]
ExecStart=/opt/lampp/lampp start
ExecStop=/opt/lampp/lampp stop
Type=forking

[Install]
WantedBy=multi-user.target
sudo systemctl enable xampp.service
sudo reboot

after reboot

scripting

sudo apt update
sudo apt install php-cli unzip -y
cd ~
curl -sS https://getcomposer.org/installer -o composer-setup.php
HASH=`curl -sS https://composer.github.io/installer.sig`
php -r "if (hash_file('SHA384', 'composer-setup.php') === '$HASH') { echo 'Installer verified'; } else { echo 'Installer corrupt'; unlink('composer-setup.php'); } echo PHP_EOL;"
sudo php composer-setup.php --install-dir=/usr/local/bin --filename=composer
cd /opt/lampp/htdocs
mkdir weatherstation
cd weatherstation

install php app

sudo git clone https://github.com/maliciamrg/Bresser-Weather-Station.git .
sudo composer require php-mqtt/client
sudo chown -R daemon:daemon /opt/lampp/htdocs

result

pfsense

in pfsense allow MQTT traffic from VLAN 10 and VLAN 20 to VLAN 30 on port 1883, where your Mosquitto broker lives (192.212.30.105)

✅ Steps to Add Rules in pfSense

You’ll need to add two rules — one on each VLAN interface (VLAN 10 and VLAN 20):

🔧 On VLAN 10 Interface:

  1. Go to pfSense Web UIFirewall → Rules → VLAN 10
  2. Click “Add” rule at the top
  3. Set:
    • Action: Pass
    • Interface: VLAN 10
    • Protocol: TCP
    • Source: Single host or alias → 192.212.10.200
    • Destination: Single host → 192.212.30.105
    • Destination port range: From 1883 to 1883
    • Description: Allow MQTT from VLAN 10
  4. Save and Apply Changes

🔧 On VLAN 20 Interface:

Repeat the same steps:

  1. Go to Firewall → Rules → VLAN 20
  2. Add rule with:
    • Source: 192.212.20.250
    • Destination: 192.212.30.105
    • Port: 1883
    • Description: Allow MQTT from VLAN 20
  3. Save and Apply Changes

🧪 Optional: Make It More Flexible

If you want any device on VLAN 10 or VLAN 20 to reach the MQTT broker, just change the source from single host to:

  • Source: VLAN 10 net
  • Source: VLAN 20 net

That way, all devices on those VLANs can connect.

test

http://192.212.20.250/weatherstation/updateweatherstation.php?ID=IANTON13&PASSWORD=nY2hD3eO&action=updateraww&realtime=1&rtfreq=5&dateutc=now&baromin=29.91&tempf=75.9&dewptf=60.4&humidity=59&windspeedmph=3.5&windgustmph=4.0&winddir=45&rainin=0.0&dailyrainin=0.0&indoortempf=81.1&indoorhumidity=53

controle

http://192.212.20.250/weatherstation/updateweatherstation.php

Ubuntu , Docker, Kubernetes

Installer ubuntu sur proxmox

Installer Docker

curl https://releases.rancher.com/install-docker/20.10.sh | sh

Update Ubuntu

Afin deviter des erreur pendant l’install il faut mettre a jour ubuntu avant de lancer la procedure d’install

sudo apt update
sudo apt upgrade
sudo reboot

Installer Kubernetes

https://ubuntu.com/tutorials/install-a-local-kubernetes-with-microk8s#2-deploying-microk8s

sudo snap install microk8s --classic
sudo ufw allow in on cni0 && sudo ufw allow out on cni0
sudo ufw default allow routed
microk8s enable dns dashboard storage
microk8s kubectl get all --all-namespaces
microk8s kubectl port-forward -n  kube-system service/kubernetes-dashboard 10443:443 --address 0.0.0.0 &&

creation d’un alias pour lancer les commandes “microk8s kubectl” directement avec ” kubectl”

sudo snap alias microk8s.kubectl kubectl
david@legion2:~$ microk8s kubectl get all --all-namespaces
NAMESPACE     NAME                                             READY   STATUS    RESTARTS       AGE
kube-system   pod/coredns-7f9c69c78c-7ljk2                     1/1     Running   1 (6h2m ago)   6h36m
kube-system   pod/calico-kube-controllers-6b654d96bd-ngxnq     1/1     Running   1 (6h2m ago)   14h
kube-system   pod/calico-node-tb2cz                            1/1     Running   1 (6h2m ago)   14h
kube-system   pod/metrics-server-85df567dd8-gfjvk              1/1     Running   0              5h57m
kube-system   pod/kubernetes-dashboard-59699458b-66gng         1/1     Running   0              5h53m
kube-system   pod/dashboard-metrics-scraper-58d4977855-lg8qw   1/1     Running   0              5h53m
kube-system   pod/hostpath-provisioner-5c65fbdb4f-nvclh        1/1     Running   0              5h53m
default       pod/embyserver-56d8c5b5bc-4xtj9                  1/1     Running   0              13m

NAMESPACE     NAME                                TYPE        CLUSTER-IP       EXTERNAL-IP   PORT(S)                  AGE
default       service/kubernetes                  ClusterIP   10.152.183.1     <none>        443/TCP                  14h
kube-system   service/kube-dns                    ClusterIP   10.152.183.10    <none>        53/UDP,53/TCP,9153/TCP   6h36m
kube-system   service/metrics-server              ClusterIP   10.152.183.220   <none>        443/TCP                  5h57m
kube-system   service/kubernetes-dashboard        ClusterIP   10.152.183.11    <none>        443/TCP                  5h54m
kube-system   service/dashboard-metrics-scraper   ClusterIP   10.152.183.66    <none>        8000/TCP                 5h54m
default       service/embyserver                  NodePort    10.152.183.74    <none>        8096:30829/TCP           9m48s

NAMESPACE     NAME                         DESIRED   CURRENT   READY   UP-TO-DATE   AVAILABLE   NODE SELECTOR            AGE
kube-system   daemonset.apps/calico-node   1         1         1       1            1           kubernetes.io/os=linux   14h

NAMESPACE     NAME                                        READY   UP-TO-DATE   AVAILABLE   AGE
kube-system   deployment.apps/coredns                     1/1     1            1           6h36m
kube-system   deployment.apps/calico-kube-controllers     1/1     1            1           14h
kube-system   deployment.apps/metrics-server              1/1     1            1           5h57m
kube-system   deployment.apps/kubernetes-dashboard        1/1     1            1           5h54m
kube-system   deployment.apps/dashboard-metrics-scraper   1/1     1            1           5h54m
kube-system   deployment.apps/hostpath-provisioner        1/1     1            1           5h54m
default       deployment.apps/embyserver                  1/1     1            1           13m

NAMESPACE     NAME                                                   DESIRED   CURRENT   READY   AGE
kube-system   replicaset.apps/calico-kube-controllers-69d7f794d9     0         0         0       14h
kube-system   replicaset.apps/coredns-7f9c69c78c                     1         1         1       6h36m
kube-system   replicaset.apps/calico-kube-controllers-6b654d96bd     1         1         1       14h
kube-system   replicaset.apps/metrics-server-85df567dd8              1         1         1       5h57m
kube-system   replicaset.apps/kubernetes-dashboard-59699458b         1         1         1       5h53m
kube-system   replicaset.apps/dashboard-metrics-scraper-58d4977855   1         1         1       5h53m
kube-system   replicaset.apps/hostpath-provisioner-5c65fbdb4f        1         1         1       5h53m
default       replicaset.apps/embyserver-56d8c5b5bc                  1         1         1       13m

Bye bye Rancher

Apres avoir vu les statistiques de consomation de rancher , je desinstalle.

Meme au repos la consomation est elevée.

Mon besoin etant limité :

  • un seule cluster
  • peu de cpu
  • ui kubernetes comme au boulot

Ubuntu , Docker, Rancher, Kubernetes

Installer ubuntu sur proxmox

Installer Docker

curl https://releases.rancher.com/install-docker/20.10.sh | sh

Installer Rancher

la commande d’installation fait que /opt/rancher est l’emplacement persistant de la configuration du node docker , ce qui permet d’assigner un disk vm pour conserver la config rancher meme si on detruit le contener docker

ajouter un disk a la vm

dans ubuntu le partitionner , formater et le monter

sudo mkdir /opt/rancher

sudo parted /dev/sdb

sudo mkfs -t ext4 /dev/sdb1

sudo nano -Bw /etc/fstab
/dev/sdb1    /opt/rancher   ext4    defaults     0        2

Execution de le commande d’installation

docker run -d --restart=unless-stopped   -p 80:80 -p 443:443   -v /opt/rancher:/var/lib/rancher --privileged --name=rancher_docker_server -e CATTLE_BOOTSTRAP_PASSWORD=password rancher/rancher:latest 

References

https://techno-tim.github.io/posts/docker-rancher-kubernetes/

Point de sauvegarde post transformation systeme

Avant de passer a une installation de proxmox sur le disk systeme du serveur je lance un timeshift.

[david@legion:/mnt/magneto/warehouse]$ sudo timeshift --create --comments "prepare Proximox" --tags M

/dev/sdd1 is mounted at: /run/timeshift/backup, options: rw,relatime,stripe=32752

------------------------------------------------------------------------------
Creating new snapshot...(RSYNC)
Saving to device: /dev/sdd1, mounted at path: /run/timeshift/backup
Linking from snapshot: 2021-09-24_02-00-01
Synching files with rsync...
Created control file: /run/timeshift/backup/timeshift/snapshots/2021-10-19_15-45-32/info.json
RSYNC Snapshot saved successfully (392s)
Tagged snapshot '2021-10-19_15-45-32': ondemand
------------------------------------------------------------------------------
Maximum backups exceeded for backup level 'monthly'
[david@legion:/mnt/magneto/warehouse]$ sudo timeshift --list

/dev/sdd1 is mounted at: /run/timeshift/backup, options: rw,relatime,stripe=32752

Device : /dev/sdd1
UUID   : 70bb9f29-b0b6-41d6-844f-0d47cfc1d596
Path   : /run/timeshift/backup
Mode   : RSYNC
Status : OK
4 snapshots, 2.7 TB free

Num     Name                 Tags  Description
------------------------------------------------------------------------------
0    >  2021-07-24_02-00-01  M
1    >  2021-08-24_02-00-01  M
2    >  2021-09-24_02-00-01  M
3    >  2021-10-19_15-45-32  M     prepare Proximox

la sauvegarde est faite